Krystal hosting review – VPS, Shared and Dedicated packages


Krystal are a UK-based host that offers configurable VPS, Shared and Dedicated packages. There’s not much choice in the UK hosting market so consequently there are some pretty steep prices out there compared to their USA datacentre counterparts. That said, Krystal seem to have all bases covered, let’s take a look at their offerings…

Krystal’s standard hosting features and guarantees

All Krystal plans share a common set of features, like premium control panel and a longer-than-most money-back guarantee. They have been in business since 2002 so they are here to stay and with over 90% of their customers recommending their hosting, it’s a no-brainer decision.

The Krystal difference

Their CEO, Simon Blackler, gives his reasons why they are different to other hosts:

In 2002, frustrated by poor service and bad business practices, I created Krystal to provide an “Honest, Reliable & Personal” alternative to the large faceless hosting corporations. We’re named Krystal because the company embodies values often associated with precious crystals, such as quality, rarity and transparency.

Over the last 15 years our unique approach to business has won us a reputation for excellence and a loyal following.
We’re now the largest independent UK web host and are rated the best web hosting company by popular review sites.

We’re in business because we’re passionate about technology and solving problems.
I hope that you’ll join us today and experience the Krystal difference for yourself.

Well, it’s true that many hosts have poor service and some even downright shady business practices, but judging on the reviews coming back from established sites such as Trust Pilot, Krystal are a force to be reckoned with.


At the time of writing, Krystal offer entry-level hosting for £3.99 monthly with these features:

  • FREE 256-bit SSL certificate
  • FREE website builder
  • 100% SSD cloud hosting
  • Unlimited bandwidth
  • Optimised for WordPress & more

There’s a configurable VPS from £9.99 monthly with these features:

  • 100% SSD cloud VPS
  • Full root access
  • Free DDoS protection
  • Free dedicated IP
  • No setup fee

For businesses requiring PCI compliance, £29.99 monthly gets you:

  • Fully PCI-DSS Compliant
  • FREE DDoS protection
  • FREE 256-bit SSL certificate
  • FREE backups every 6 hours
  • FREE domain name for life

The big plus is that you get a 60 day money back guarantee with everything, so a full refund can be had and you lose nothing (except your time testing their servers). In our experience you’ll probably stay with them as the ping times are as good as anything we have seen on the UK market and server configuration options are up there with the best.

Verdict

What we really like is the company’s transparency. They are trying to do things differently and succeeding – a refreshing thing in the murky world of hosting. They use green technology, which means 100% renewable energy at all of their sites, which we love because reducing the impact of these datacentres is a must.

With a more-than-standard offering, Krystal have certainly raised the bar. For the price-conscious, the VPS and dedicated prices are spot-on, being considerably cheaper than the opposition such as FastHosts, Rackspace, Ionos, 123-Reg and more (comparison reviews coming soon). There’s 24/7 ticket and email support, extremely friendly telephone support (10:00 to 17:00 UK time), cPanel, free migration assistance, automated backups, PHP (5.6 to current) and all the usual stuff like MySQL, PHPMyAdmin, SSH and even the ubiquitous Softaculous. What isn’t there to like? Click the link below to get hosting from what we believe is the best available for UK hosts:

Try Krystal free for 60 days


My new Smart TV doesn’t support Amazon Video

We have had an upturn in calls about linking Smart TVs to services such as Amazon Prime Video and Netflix.

Many new smart television sets aren’t actually that smart it seems. Some give you a very basic set of apps just so they can use the term ‘smart’ on their advertising it seems. Common offenders seem to be JVC, Sony, Panasonic and many more big names.

So let’s look at what you can do if you purchased one of these and can’t get your favourite service on there. I’ll use Amazon Video as an example but you can substitute Netflix or similar apps here too.

Search for the Amazon app on your TV

First off, go into the app section of your television and see if there is an area to install new apps. If so, use the search facility to find ‘Amazon’ and if you see their video app then install it. Now, streaming video should be a matter of opening the app and signing in (just once) with your Amazon credentials.

If your TV doesn’t allow you to install other apps or you can’t find the Amazon one, then you’ll need to buy an external device such as a Fire stick. Amazon Fire sticks are pretty cheap and work well providing you have half decent WiFi. Clicking the image below links to their best seller:

Amazon Fire app install on smart tv JVC Sony Netflix

Alternatively, you can look at the same Fire stick, but buy a 4K version to match your 4K television. If you have one of these, then your streamed video will be as good quality as you can get. They aren’t much more and are pretty future-proof. They are also compatible with any TV (4K or not). Click on the image below:

Amazon Fire stick 4k tv video streaming

Can I connect a Fire stick by Ethernet? 

If you have Ethernet cabling close by, then you can buy an optional adapter because later Fire sticks have micro Ethernet ports. Ethernet basically uses a cable that plugs into the back of your router. A cabled connection is always faster and more stable than a WiFi one. Here’s the adapter:

How can I connect multiple devices to one Ethernet cable?

Well, there is a caveat here and that’s because people generally have just one cable from the router that goes close to the TV (if any at all). This means that you can’t use the TV on the same cable for other Smart functions – it’s either the TV or the Amazon box, unless you use one of them over WiFi.

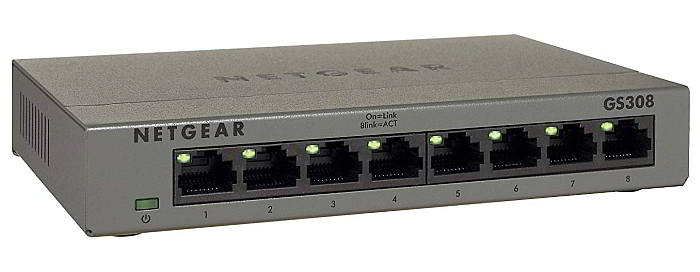
My favoured solution, and one that we install for many clients, is to use a cable from the back of the router into what is called a ‘switch’, generally located in your TV cabinet. A switch will allow multiple devices with cabled connections to transmit and receive data from the internet.  

Buy an 8-port Gigabit one which are cheap but have the capacity to deliver the best speeds. Something like this very low power consumption Netgear GS308:

You insert the cable from the router into one port and then you have 7 free ports to connect to other devices such as your TV, DVR, Fire stick, Xbox, Playstation etc. For that you’ll use a few patch cables. We use
Cat 6 patch cables which are more than capable of supporting Gigabit speeds and can be had very cheaply. 

If you can’t shell out for any of these (student, we’re looking at you!) then you can also consider using an existing laptop or tablet and an HDMI cable if that suits your viewing habits better. It’s a bit clunky though and we’d definitely recommend using the Fire sticks above, especially because they both have excellent remote controls and are portable.


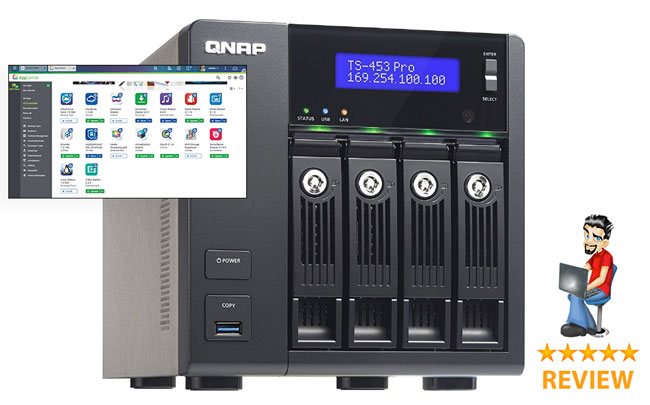
QNAP TS-453A-4G 4 Bay NAS Enclosure with 4GB RAM Review

qnap ts453 453a review comparison


I have been in the market for a new NAS drive to replace the Synology NAS that has propped up my company’s data storage requirements for the last few years. As with many companies, we have outgrown our backup storage and so we opted to go for something pretty future-proof. Well, for the next five years anyway…

What I particularly like about the QNAP system is that it oozes functionality. Nothing elaborate in terms of style or base technology, but there are a raft of free apps to do just about anything you need to. This means that it makes good sense when you need to install for small, medium or large businesses as there is some scalability there. You can run Virtual Machines (VMs) on there so it becomes far more than just a dumb NAS box. It also integrates nicely with a Windows Server environment, taking identities from the Active Directory and bringing them over into its own environment.

Build quality

The box itself is quite well made and fairly compact. We went with a 4-bay unit that we popped some 4TB drives into and got our overall storage capacity up to 8TB (more on that later).

Features and concept

The TS-453A 4G NAS server is said to be designed for small to medium sized businesses, allowing its users to use the NAS as a storage device and a multitasking and multifunctional light-weight server. It is powered by a decent Quad-core Intel® Celeron® N3150 CPU and there is dual-channel 4/8GB DDR3L-1600 RAM (upgradable to 8GB).

There are 2 Gigabit LAN ports which allow connection to 2 separate networks and the hard drives are SATA 6Gb/s. The TS-453A can deliver up to 224 MB/s read speeds which is not too shabby.

Unusually the TS-453A can automatically increase the processor’s clock rate from 1.6GHz to 2.08GHz when performing CPU-intensive tasks.

There is AES 256-bit encryption for both full NAS volume and shared folders,  which ensures the safety of sensitive business data that may be stored on the drives.  A nice touch is that the TS-453A features an Intel® AES-NI hardware-accelerated encryption engine. This helps to drive transfer speeds theoretically up to 224 MB/s, which is a welcome boost to system performance & security.

Home video streaming users will like the 4K (H.264) video playback and 1080P/4K video real-time transcoding right from the NAS to an HD or 4K display. It also has 1080p video transcoding to convert videos to universal formats that can be smoothly played on PCs, mobile devices and Smart TVs. There is real-time and offline 4K video transcoding which we didn’t have chance to test but sounds good.

Interface

This QNAP box uses QTS, which gives a super-slick NAS experience. The interface is a no-frills, classic Linux look – functional and fast. We found that the intelligent desktop allows you to search for functions extremely quickly (there are lots of them!) and running multiple application windows was not a problem, even when we loaded multiple apps and tasks at the same time.

Disaster recovery

The TS-453A runs something called Real-Time Remote Replication (RTRR). In short, this supports real time and scheduled data backups to either an FTP server or another QNAP NAS. It also synchronizes files to a remote folder from a local folder. What we liked was the rsync support which pushed our data to our remote server at our pre-programmed schedule. If you are interested in this, the push/pull supports Amazon S3, Amazon Glacier, Microsoft Azure, ElephantDrive, Dropbox, Google Drive, Google Cloud Storage and a few more.

A nice feature is that you can restore files with the ‘QTS Storage Manager’ snapshot tool. You can:

  • take snapshots for both volumes and LUN (up to 256 snapshots per volume or LUN and maximum 1024 snapshots per NAS)
  • efficiently replicate volume/LUN snapshots via Snapshot Replica to remote servers (by copying only the changes made)
  • quickly clone a volume /LUN snapshot as a local volume without interrupting the system’s current operation
  • set up the system to automatically take a snapshot of the volume before backup via ssync/RTRR (even when the file is opened).

Server virtualization

synology qnap ts453 453a reviewYou can host virtual machines on your TS-453A via QNAP’s VM hypervisor called ‘Virtualization Station’. Access to these is provided by VNC or a web browser interface. The TS-453 and the VMs can share the same LAN port as it uses high-speed virtual switches and Software-defined networks (SDNs). We noticed little or no lag in our testing which was impressive.

QNAP’s ‘Container Station’ integrates LXC and Docker virtualization technologies, allowing you to operate multiple isolated Linux systems. For the Docker fans out there, you can also download apps from the built-in Docker Hub Registry.

File searching

QNAP’s file searching is impressive and when we loaded up a Gmail backup with over 15,000 emails it searched very quickly to locate our email, offering a preview of it. There’s also an online document app which adds edit and preview functionality to files.

Cross-platform file sharing

The TS-453 supports SMB/CIFS, NFS, and AFP protocols which means that you can file share across Windows, Mac and Linux/UNIX networks. Data, logs and ISO images of CDs and DVDs can be centrally stored on the TS-453A and protected by an integrated antivirus solution. The Windows Active Directory and LDAP services enable system administrators to configure user permissions by using an existing Windows AD server, LDAP server or built-in LDAP service. The TS-453A supports SAMBA v4 and can act as a Windows domain controller to manage privilege settings.

Hard drives

We went with the 4TB Western Digital ‘Red’ drives that are specifically designed for continuous use and general NAS usage. They are pretty much silent when spinning and come with the WD 3 year guarantee (register for this when you get the drives). We setup a raid array that gave us some redundancy but you could go all-out and combine all the drives into one big fat storage pool. Your call, but make sure that you have backup whichever way you go.  Pushing to Amazon S3 is a good call.

Verdict

All in all, this unit excels at being a NAS drive and adds superb additional functionality into the mix. It’s versatile and cross platform and doesn’t require additional software or licences to perform. The simple, clear interface makes some normally heavy technical tasks quite painless. It gives the current offerings from NAS mainstays such as Synology a real wake-up call to add some useful features to their operating systems because many SMBs need these additional tools now.

We’d suggest that you give it a try and we’re pretty confident that you’ll be a convert.

5 star rating

5 out of 5 stars – reviewed 23rd November 2017


Cannot find unread emails in Gmail inbox

I have had quite a few customers calling over the years to say that they cannot find unread emails in their Gmail inbox. It’s a common complaint and one which I have found can be quickly cured by doing the following.

Logon to Gmail in your browser (Chrome, Firefox, Internet Explorer, Safari etc).

Go to the search bar at the top of the Google page (the one with the blue and white ‘magnifying glass’ search button that looks like this):

cannot-find-unread-email-inbox-gmail

In that box, type this:

is:unread in:anywhere

Note that there is a space after the word ‘unread’ but not anywhere else. Copy and paste my text above if you aren’t sure.

Now press enter and you should see all of your unread emails! You can click to read individual ones or select them using their check boxes and then do ‘More’, then ‘Mark as read’.

Try some new search terms to get more out of Gmail

If you want to take things further, there are lots of useful search ‘operators’ that you can use within Gmail too. Get used to using these and you’ll open up a whole new level for this great email tool. Here’s a list of the most popular ones:


What you can search by Search operator & example
Specify the sender from:

Example: from:amy

Specify a recipient to:

Example: to:david

Words in the subject line Subject:

Example: subject:dinner

Messages that match multiple terms OR or { }

Example: from:amy OR from:david

Example: {from:amy from:david}

Remove messages from your results -

Example: dinner -movie

Find messages with words near each other. Use the number to say how many words apart the words can be AROUND

Example: dinner AROUND 5 friday

Messages that have a certain label label:

Example: label:friends

Messages that have an attachment has:attachment

Example: has:attachment

Messages that have a Google Drive, Docs, Sheets, or Slides attachment or link has:drive

has:document

has:spreadsheet

has:presentation

Example: has:drive has:document

Messages that have a YouTube video has:youtube

Example: has:youtube

Messages from a mailing list list:

Example: list:[email protected]

Attachments with a certain name or file type filename:

Example: filename:pdf

Example: filename: homework.txt

Search for an exact word or phrase " "

Example: "dinner and movie tonight"

Group multiple search terms together ( )

Example: subject:(dinner movie)

Messages in any folder, including Spam and Trash in:anywhere

Example: in:anywhere movie

Search for messages that are marked as important is:important

label: important

Example: is:important 


Starred, unread, or read messages is:starred

is:unread

is:read

Example: is:read is:starred

Messages that include an icon of a certain color has:yellow-star

has:blue-info

Example: has:purple-star

Recipients in the cc or bcc field cc:

bcc:

Example: cc:david

Note: You can’t find messages that you received on bcc.

Search for messages sent during a certain time period after:

before:

older:

newer:

Example: after:2004/04/16

Example: before:2004/04/18

Search for messages older or newer than a time period using d (day), m (month), and y (year) older_than:

newer_than:

Example: newer_than:2d

Chat messages is:chat

Example: is:chat movie

Messages delivered to a certain email address deliveredto:

Example: deliveredto:[email protected]

Messages in a certain category category:

Example: category:updates

Messages larger than a certain size in bytes size:

Example: size:1000000

Messages larger or smaller than a certain size in bytes larger:

smaller:

Example: larger:10M

Results that match a word exactly +

Example: +unicorn

Messages with a certain message-id header Rfc822msgid:

Example: rfc822msgid:[email protected] 

Messages that have or don’t have a label has:userlabels

has:nouserlabels

Example: has:nouserlabels 

Note: Labels are only added to a message, and not an entire conversation.

Credit for search operator list:  https://support.google.com/mail/answer/7190?hl=en


Cheapest Norton 360 renewal

cheap norton security discountI’m frequently asked by customers how to get the cheapest renewal price on Norton 360.  Symantec’s renewal price is really one of the highest for any Internet Security product.  It is a capable package though and worth keeping on your PC. The best way by far is to purchase a new fully licensed program at a reduced price and install that. Nothing underhand, just a new product at a price much lower than Norton currently quote for renewal.

The beauty of this is that you don’t have to uninstall your current product if it is the same ‘family’ as the one you are installing, simply match the product family. For example, if you have Norton Security, get a Norton Security package with any version number as they all qualify for Norton’s free upgrade to the latest version anyway! If you have the older Norton 360 then get Norton Security and uninstall Norton 360 first.

Do Norton really offer a free upgrade?

Yes, most versions of Norton qualify for a free upgrade to the latest version in that product family. If you download the latest installation program, Norton will auto-detect and remove your older version and then install the newer one too, making it even simpler to install.

Please note

You can change to another security software at this point. From doing lots of virus clean-up work and labs testing, I would recommend uninstalling the Norton product and installing my preferred security suite and consistent labs test winner Kaspersky Total Security. Norton is quite capable but Kaspersky definitely has the edge on speed and low resource usage.

A word of warning. Norton products such as Norton 360, Norton Internet Security and Norton Antivirus are now retired in favour of “Norton Security” and “Norton Security with Backup”. Confused? This article explains more: New Norton product family (opens in a new window).

So to recap, if your Norton 360 has expired, then take a look in my software shop (opens in a new tab) and buy either a Norton or Kaspersky product at prices cheaper than Symantec’s renewal rates. If you want to upgrade to another software product (such as Kaspersky) then simply uninstall the existing Norton software, restart the computer and then install the Kaspersky product.

Don’t forget to ‘Tweet’ or Facebook ‘like’ this article if it saved you some cash!

Shop for Norton products now


Outlook emails stay in Outbox after Windows 10 upgrade

email-settings-pop-imap-btconnect-outlookAre you getting your Outlook emails stuck in your Outbox after upgrading to Windows 10? I’ve seen this happen on several machines and it really seems to be a problem where Windows corrupts the Outlook database and/or profile on many versions of Microsoft Office (2007, 2010 and 2013). The easiest fix and one that I’d recommend here is to delete or move the stuck emails then close all programs that are open such as Outlook.

Now we can use the in-built Windows “System File Checker” that will scan your PC and repair any corrupt files that it finds. To do this:

  • Click Start
  • Type cmd in the Search box
  • Right-click Command Prompt and then click ‘Run as administrator’. If you are prompted for an administrator password or for a confirmation then type the password or click ‘Allow’
  • In this black window (the command prompt) that appears, type in sfc /scannow noting the space before the forward slash
  • Press enter and go and grab a delicious cup of coffee because this will take a while

Note: Do not close this Command Prompt window until the verification is 100% complete. The scan results will be shown after this process is finished.

Technical information for nerds
The sfc /scannow command will scan all protected system files, and replace corrupted files with a cached copy that is located in a compressed folder at %WinDir%\System32\dllcache.
The %WinDir% placeholder represents the Windows operating system folder. For example, C:\Windows.

The time taken to complete this scan is different on every PC but usually can range from 20 minutes to an hour or more. If it solves your problem (which it has on over 50 client PCs to date) then please take a minute to drop a comment below or maybe buy something through our shop to say thanks.


Reset Windows Server 2012 Administrator password

server 2012 password resetTo reset the Administrator password on your Windows server 2012 installation, you’ll need to do the following:
Boot from the Microsoft Windows Server 2012 DVD

  1. From the Windows setup menu, click “Next”
  2. Select “Repair your computer”
  3. Click on “Troubleshoot”
  4. Under Advanced options, click “Command Prompt”
  5. Type “diskpart” and hit Enter
  6. Type “list volume” and hit Enter. This will show you your (current) drive letter allocated to the drive where Windows is installed. Note  – if you don’t see any volumes listed and this is the first boot cycle for a new Server 2012 installation, then I have seen this on a few HP servers and you’ll need to go and run the setup again from within the Intelligent Provisioning area.
  7. Make a note of the drive letter and type “exit” then press enter to leave diskpart (but stay in the command prompt window)
  8. Presuming the letter is d, then type “d:” and press enter to change to this drive
  9. Now type  “cd Windows\system32” and press enter which will take you into the system32 folder
  10. Type “ren Utilman.exe Utilman.bak” and press enter
  11. Type “copy cmd.exe Utilman.exe” and press enter
  12. Close the command prompt and then click “Continue”
  13. The server should now reboot to the logon screen. Press the Windows key + u to open a command prompt
  14. At the prompt you can change the password by typing “net user administrator xyz” where xyz is your new super-secure password!
  15. Now, for security we must do one last thing. Once we are back in Windows, open Explorer, navigate to Windows\system32 and rename Utilman.bak to Utilman.exe


Hopefully this gets you out of a sticky situation, leave me a comment if it has helped.


Crash Plan backup software full review

CrashPlan has been around for a while now and is looking like one of the best solutions out there for business and personal backups.

With no storage size limits, bandwidth caps or file-type restrictions, Crash Plan really has lots going for it. On top of this, there’s enterprise-class hardware and military-grade security with no extra fees payable.

What I particularly like about Crash Plan is that there is free backup to an external drive and any trusted, internet-connected computer. You can also subscribe to their robust cloud-based destination, “CrashPlan Central” and this is certainly worth the extra money. It’s as quick as any cloud-based backup we have tested and the interface is functional and quite slick.

See what Crash Plan can offer here


crashplan online backup


Scan a Linux server for viruses and malware

linux server virus scan


This article tries to explain, using my own experience of server management, how to scan a Linux server for viruses and malware.


You are probably here because you have something on your server already, very often pushing out spam emails to people via php files. Or maybe you have fallen victim to the Hacking Holy Grail – the attacker now has root access to your server. Let’s stop that now, eh?

This tutorial has screenshots from a CentOS server and this is what I used to create this guide. Your server may well be different but the principles I use are the same, you may have some detail changes to make regarding file paths. If you don’t understand anything drop me a comment or use a search engine to find your answer quickly.

Let’s start by running a virus scan with ClamAV, a free and useful antivirus. Presuming that it is not installed we would need to do this (skip to your OS below or jump to updating definitions if it is already installed):

Installing ClamAV on CentOS 5

Install EPEL5 https://fedoraproject.org/wiki/EPEL/FAQ#howtouse

rpm -Uvh https://download.fedoraproject.org/pub/epel/5/i386/epel-release-5-4.noarch.rpm

Now we can install ClamAV using the yum package manager

yum install clamav-db clamav clamd

Now turn on and start the clamd daemon

chkconfig clamd on
/etc/init.d/clamd start

Installing ClamAV on CentOS 6

Install EPEL6 https://fedoraproject.org/wiki/EPEL/FAQ#howtouse

rpm -Uvh https://download.fedoraproject.org/pub/epel/6/i386/epel-release-6-8.noarch.rpm

Install ClamAV using the yum package manager

yum install clamav-db clamav clamd

Now turn on and start the clamd daemon

chkconfig clamd on
service clamd start

Installing ClamAV on Ubuntu/Debian/Mint

Install ClamAV using the apt-get package manager

apt-get install clamav clamav-daemon clamav-freshclam

The latest installer automatically creates default configuration files and launches the freshclam and clamd daemons. You don’t have to do anything else here which is a nice touch.

Righto, now let’s update the virus definitions…

Updating ClamAV virus definitions

For the sake of brevity, I’m presuming CentOS 6 from now on but it will be the same or similar for most Linux derivatives.

In /usr/local/cpanel/3rdparty/bin/ we can run this to get the latest definitions:

/usr/local/cpanel/3rdparty/bin/freshclam

And now we can do a full scan with a full report sent to a log file of our choice:

/usr/local/cpanel/3rdparty/bin/clamscan -ri -l /path/to/log.file -r /path/to/be/scannned

For example:

/usr/local/cpanel/3rdparty/bin/clamscan -ri -l ~pcrepairman/scan.log /home/*/public_html

Note: The tilde character denotes the home directory for that user and the wildcard (asterisk) denotes all users in the home directory. If you want to scan a single user’s home directory then simply put their name where the wildcard is.

In the files above we use some switches.

  • -r means that we recurse the subdirectories
  • –i means Clamscan will only list infected files (chained together with recurse above we get -ri)
  • -l means that Clamscan will log to the path you choose after it

For more help, run /usr/local/cpanel/3rdparty/bin/clamscan –help

Now it’s coffee time as your server is scanned over by ClamAV using the latest definitions. When it is finished you will see your bash prompt again. Ideally, you see that Clam reports no infections like this:

Clamscan linux server

While it’s running, try to have a look online for what may have caused the infection and see if it ties up with your Clam results. Very often we see that WordPress plugins have caused the issue. Why them? Well, think about it:

WordPress is the most popular Content Management System out there

  1. It’s used worldwide
  2. It’s often installed at the click of a button using tools such as Softaculous, so it’s dead easy to install
  3. It’s free, ‘Open Source’ software so attackers know the code inside out (well GNU GPL actually)
  4. There are a huge amount of free plugins available from developers around the world, many who have a less-than-basic grasp of how to code securely. Even the good ones get caught out!

Now my third point above is not really fair. It kind of insinuates that Open Source software is more unreliable in the security stakes. Quite the opposite in fact, vulnerabilities get plugged very quickly if there is an active community of developers. However, the sheer ubiquity of WordPress leads to it being a target in much the same way that Microsoft Windows is. The gains for an attack on WordPress are much more than one for Drupal (for example) purely because of the user base.

Even if a vulnerability is plugged with an update pretty fast, it still relies on the user being aware of the problem, downloading the update and applying it BEFORE someone exploits it.  To this end, a daily Clam scan is not a bad idea unless your server has lots of files on it or not many resources available to run the scan in a timely fashion.

Moving on from this virus scan, I would suggest that we look at what email your server is sending out. I detail it in this article here:

Find what emails are being sent from a Linux server


Kaspersky Pure replaced by Total Security

Since I am getting a lot of questions on where Kaspersky Pure has gone and how to upgrade, I’ll try to clarify a few things. Yes, the main Kaspersky.com website has now dropped Pure as a product, seemingly without notification. The localized websites (such as .co.uk etc) have followed too. It seems that Kaspersky Pure has been phased out in favour of ‘Total Security’. There are a lot of Pure installation CDs out there so what to do?

OK, so here comes the terminology first:

  • KTS stands for Kaspersky Total Security
  • KIS stands for Kaspersky Internet Security
  • KAV stands for Kaspersky Anti-Virus
  • Changing from one installed product to another is called ‘migrating’

If you have an active or expired Kaspersky PURE 2.0 or 3.0 license, you have special options of migrating to Kaspersky Total Security. You can also migrate to Kaspersky Total Security from Kaspersky Internet Security and Kaspersky Anti-Virus or vice-versa.

Who can’t upgrade to Kaspersky Total Security?

Note that free migration to Kaspersky Total Security is not possible for the oldest versions of Pure. These were the original ‘version 1’ programs but are called:

Kaspersky PURE
Kaspersky PURE R2 (note that this is NOT the same as Kaspersky Pure 2.0)

They can’t be upgraded because their activation codes are incompatible with Kaspersky Total Security.

Now we know what versions can’t be upgraded, let’s upgrade those that can…

Free upgrades to Total Security

Successful upgrading depends on the current status of your license:

  • If you have an active licence for Kaspersky PURE 2.0 or Kaspersky PURE 3.0, you can simply use your current activation code for migration (upgrading) to Kaspersky Total Security.
  • If your license for Kaspersky PURE 2.0 or Kaspersky PURE 3.0 has expired, you can visit my shop here to buy Total Security at a cheaper price than renewal, then install it which migrates the licence for you automatically.

Migrating the Pure licence key to Total security

If you have Kaspersky PURE 2.0 or Kaspersky PURE 3.0 installed on your computer, do the following to upgrade to Kaspersky Total Security:

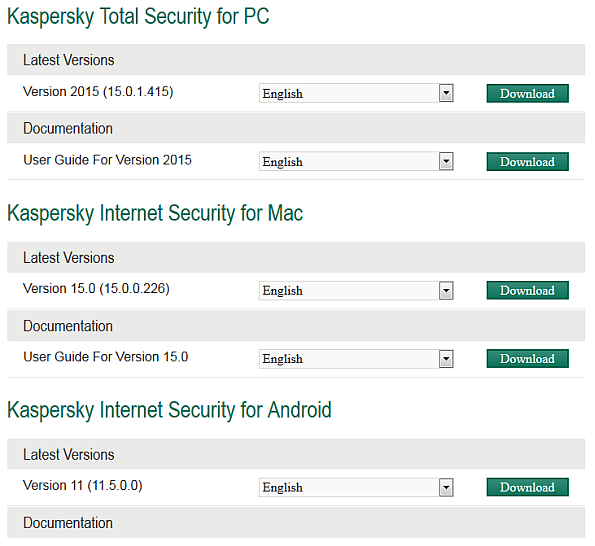
Download the Total Security package here (opens in a new window for you). This is what you should see:

kaspersky download total security

Grab the top one in my screenshot above, Total Security, and download it. Now we have 2 options, either installing over the top of Pure or removing Pure and installing your downloaded KTS. I have listed both below:

Option 1 – Install Kaspersky Total Security without removing Kaspersky PURE

When you install Kaspersky Total Security on top of Kaspersky PURE 2.0 or Kaspersky PURE 3.0, the following data is preserved:

  • License information
  • Quarantined objects
  • Product settings (config settings including Backup tasks)
  • Encrypted containers (including all data)
  • Password Manager databases for all user accounts. All data that was available when working with Password Manager, such as passwords to programs and accounts, identities, notes, etc.
  • Anti-Spam databases (if the Anti-Spam component was previously used)
  • Backup stores

This makes it the easier option for most users. If you are not experiencing any issues with Pure then do this. If you have slowdown issues, configuration problems or just want a fresh install (which is always nicer) then jump to Option 2 below.

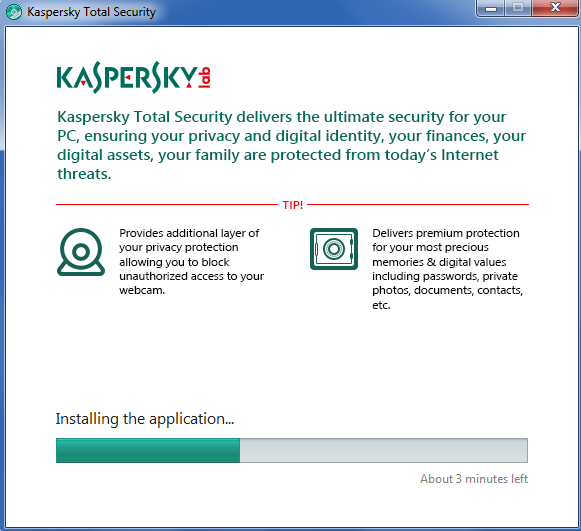
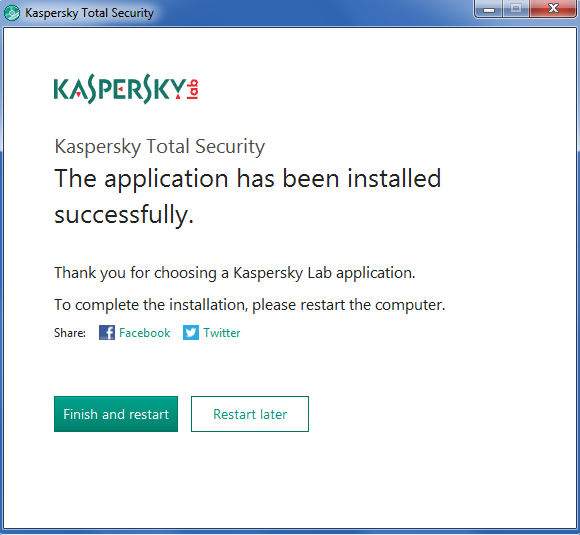
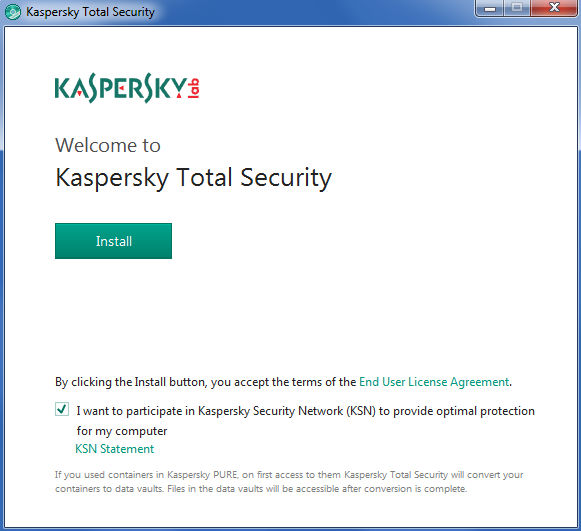
Screenshots of the installation process when installing over Kaspersky Pure:

install-kaspersky-total-security

installing-total-security

finish-restart-total-security

This took about 3 minutes for us to complete including the restart, just accept the defaults.

Option 2 – Install Kaspersky Total Security, removing Kaspersky PURE first

CAVEAT – You must have your licence key available which can be found on the card inside the product case.

CAVEAT 2 – You will lose any saved passwords in the Kaspersky Password Manager. Not everyone uses this and it won’t affect other password managers such as LastPass, Roboform, Keepass etc.

CAVEAT 3 – You will lose any quarantined files, backup stores, encrypted containers and spam databases (if used) which are again specific to Kaspersky Pure

  • Fully uninstall Kaspersky Pure via your control panel.
  • Reboot your PC
  • Install Total Internet Security from the file you downloaded earlier or from a packaged CD

If you have never installed a program before, here is some help how to do it:


I hope that this helps answer your questions on installation, upgrading and compatibility. Kaspersky remains the most effective of all the antivirus and Internet security suites that we have tested in our workshop and Total Security is a worthy replacement for Pure.