Install Irfanview and resize images easily

Here’s a quick tutorial how to resize images quickly and easily using a great free program called Irfanview.

First, if you haven’t already, download and install Irfanview from https://www.irfanview.com

When starting the program for the first time go to the top menu and select:
Options > Set file associations > Images only > OK
Now all images will open in this nifty program, it’s good and fast.

Note that with the latest Windows 10 updates, you need to go to Settings > Default Apps and set IrfanView as your default viewer. Some Windows updates are known to actually remove IrfanView altogether!

Resizing an image with Irfanview

Resizing images really depends on what you want to achieve as an end result. There are a few common scenarios here:

  1. You want to resize pictures to keep the file size down because you are sending by email. This option is usually when sending family pictures or work images to a colleague.
  2. You want to create an avatar, logo or smaller image from the original image.
  3. You want to crop a section of the image and resize it afterwards.

In each of these cases, we shall be using the resize dialog box so let’s see how to open this now.

Open Irfanview from the shortcut or All Programs menu, and click on File > Open.

In the box that opens, navigate to the image you want to resize. Double click it or click on the Open button.

The image will open up in the main Irfanview window.
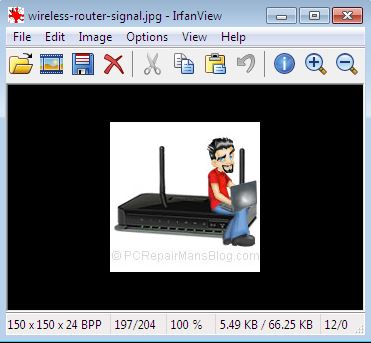
Irfanview resize image tutorial

From the toolbar menu at the top, click Image and select Resize/Resample. This will open the Resize/Resample image dialog box which is where you will select the settings that will be applied to your final image.

Now we want to either use some of the handy presets you see to the right side or manually add our image sizes. Think of 800 x 600 pixels as a landscape orientation, postcard sized image and you won’t be far wrong. This is an ideal size to send pics to family and friends by email and not have them clogging up their inbox. Most digital cameras now have extremely high pixel count so your original could be something like 2992 x 2000. This is obviously a landscape image because the first figure quoted is always the width, the second being the height. Resizing this image to 800 x 600 would work as landscape photos are generally close to a 4:3 ratio (although that example of 2992 x 2000 is not quite 4:3). Because some stretching of the image would occur in that case, we can actually check the box preserve aspect ratio. Now, typing in your desired width should alter the height accordingly and vice versa, resulting in a non-stretched image. It’s up to you if you want to apply sharpen after resample, this is generally better when going to a very small image such as used for icons and avatars, so I would generally avoid it for larger photos. For images on web pages such as WordPress powered sites, a width of 500 pixels (px) is usually sufficient for the content areas, going down to 150 px where we are wrapping text around the image.

In the Size Method box, put a tick next to Resample (better quality), and using the dropdown arrow, select Lanczos filter (slowest). What we are doing when resizing is effectvely getting rid of pixels, so the image needs to have a degree of loss applied to it that the human eye can’t see that well. The jpeg format is called a ‘lossy’ format for this reason. When you see a pixellated image, this is generally because it has been compressed a bit too much and too many critical pixels have been lost.

When you have the settings the way you want them, click on the OK button. Irfanview renders the image in its new size, although it may still be zoomed in or out. Use the + or – magnifying glass on the toolbar to zoom in or out until you see 100% displayed on the lower toolbar of Irfanview. This is your actual image size, as rendered by your monitor.

IMPORTANT NEXT STEP

You currently have the resized file in the main Irfanview window but it isn’t saved. Most photographs are better quality when they are original and making them smaller reduces quality, so we generally don’t save the image at this point. We do a File > Save As. Think of this as duplicating the file and you won’t go wrong, we are saving another copy of the image but in a different size. You have the chance to navigate to a new folder (I usually create one called Resized) and save the image with a descriptive name, something like:

fred-birthday-party-may-2024.jpg

I like to keep all filenames lowercase and separate words with hyphens as it’s much better for search engines and for web server semantics when uploaded to the web.

Saving in Jpeg format is generally good for photos, it results in smaller file sizes. Slide the quality slider up to 100 for best quality though as the JPEG format is ‘lossy’. This means that the new image will be slightly poorer quality but much faster to load over the web and much smaller to send via email or social media.
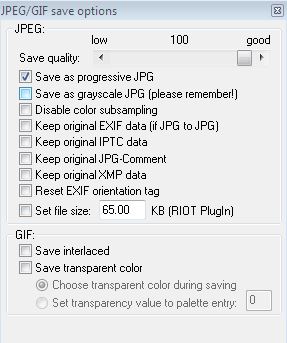
Resize image irfanview jpeg quality

If you’re saving for the web you’ll want to uncheck ‘Keep original EXIF data’ for your privacy. Remember, EXIF data can tell people where the photo was taken and on what device.

Now all that remains is to click on Save and you are done.

I hope that helped to clear up a bit of resizing mystery, please drop me a comment below if you have any questions or just to let me know it helped.

Kaspersky Internet Security licence renewal instructions

These are the instructions to follow when renewing the licence on Kaspersky Internet Security. I’ll presume that you have a new licence key to hand from a recent version and that the product is the same (eg not Kaspersky Pure etc). If you don’t have a new licence yet, you’ll find them for sale at discounted prices here [Hint: search for ‘kaspersky internet security 3 user’ or however many computers you need to protect]

You can buy the new licence in advance of your current product expiring, but you don’t need to wait until the existing licence has expired to install it any more. Kaspersky now seems to add on the remaining days from your current licence to your new licence, providing the product is the same.

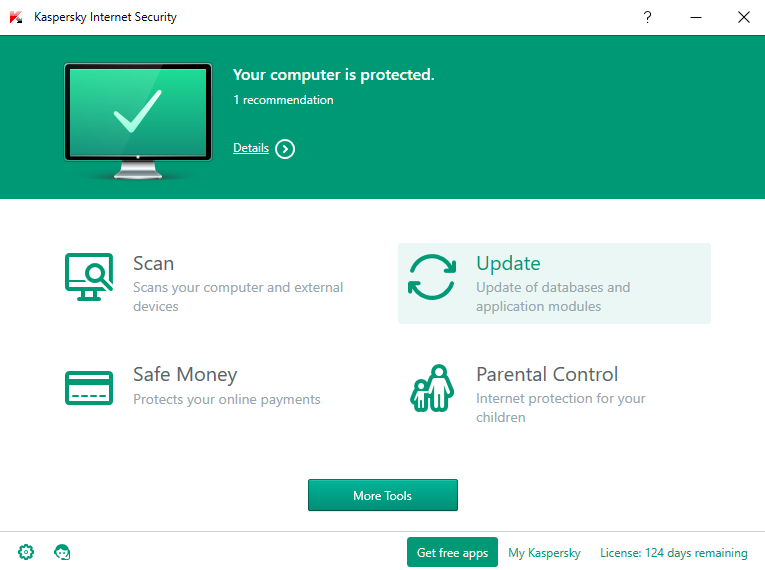
First, open Kaspersky. The quickest way is to double click the icon in your system tray (bottom right of your desktop screen). If you can’t see it there, use the little arrow on the left to expand the icons and find it. It’s a red letter K like this one below:


kaspersky-internet-security-1


Now, look in the bottom right of the Kaspersky window and click on ‘License: xx days remaining’ (where xx is your actual days remaining).


kaspersky-internet-security-2


Now click on the ‘Enter activation code’ button.


kaspersky-internet-security-3


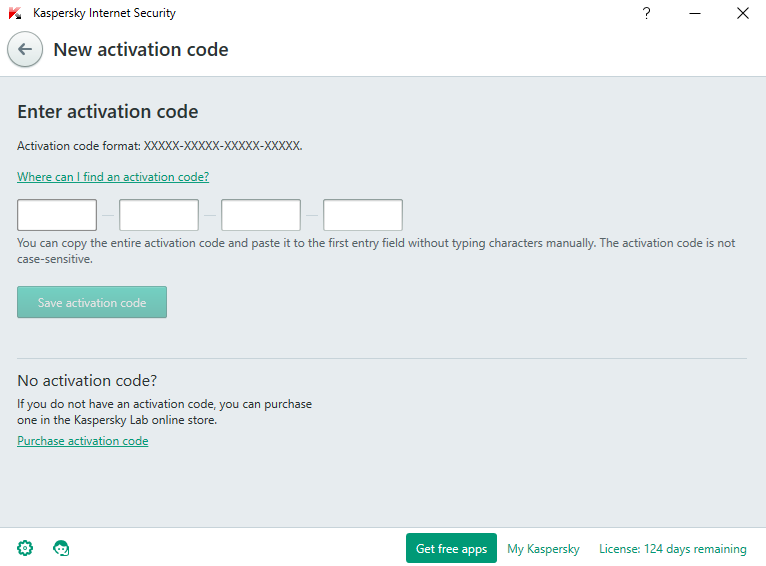
Finally, type in your activation code, or copy and paste it if you received it by email. Be careful to get EXACTLY the right code as some letters do look similar! You can copy and paste the whole of the new licence key into the first entry field, it will separate them for you.


kaspersky-internet-security-4


Press the ‘Save activation code’ button and you’re done. Give the PC a restart, open Kaspersky again and you should be able to see your licence has the correct amount of days remaining.

I sell full versions in my shop here at discounted prices that are often much cheaper than renewal. Grab the code from those and you won’t need to install anything, just follow the method above.


What is a shebang in Linux?

shebang script explained

Known as a a shebang or a bang line, this is just the characters at the very start of a Linux script. It is simply a hash or number sign followed by an exclamation point character (#!). This is then followed by the full path to the interpreter, for example /bin/bash

Think of it as a necessary code mark that tells the system the absolute path to the Bash interpreter and you’ll not have a problem.

More info on how to use and execute Linux scripts here


Four ways to execute a shell script

shebang script explainedIf you need to execute a shell script and can’t get your head around the conflicting information out there, I’ll try to clear things up. There are quite a few ways to execute a shell script and each has its pros and cons. If you are coming from a Windows environment where the file extension dictates how we handle the file, then try not to think like this. A script can have no extension but still be run. So, let’s take a look at our four ways to execute a shell script.


Execute shell script by calling the filename (Method 1)

This method simply changes into the script’s containing directory and calls the script’s file name to execute it.

We can change into the directory first

$ cd /usr/bin


and then call the script thus:

$ ./myscript


Now, my preferred method is to consolidate these 2 lines into 1 , calling it from any directory by simply adding the full path to the file:

$ /usr/bin/myscript


If you have the shebang at the start of this script, then it will be executed by using the command interpreter that is specified directly after it.

Execute shell script by specifying an interpreter (Method 2)

You can also run a shell script by specifying the interpreter. You do this by adding the preferred interpreter within the command thus:

Execute the script using the bash interpreter

$ bash myscript


Execute the script using the sh interpreter

$ sh myscript


There are usually several interpreters available such as bash, sh,  csh, ksh and more.  Note that if you use a different interpreter in the shebang, this will be overridden by the one you specify.

Execute shell script with . ./ (Method 3)

If you execute the shell script by using . ./ (aka ‘dot space dot slash’), it will not fork a sub shell and you’ll see it executed in the current shell.

$ . ./myscript


Why do this? Well it’s normally used after we have changed something in the .bashrc or .bash_profile. Using this method of execution we won’t need to logout and login again.

$ cd ~

$ . ./.bashrc

$ . ./.bash_profile

Execute shell script with source command (Method 4)

source is a bash shell built-in command that executes the contents of the file, which is passed as argument, in the current shell. It has a synonym that you can use which is the dot or period (.)

This can replace the ‘dot space dot slash’ method.

source myscript [arguments]

. myscript [arguments]


A word of warning here though because ./ and source are not quite the same.

./myscript runs myscript as an executable file in a new shell
source myscript reads and executes commands in the current shell environment

To help further, ./myscript is not the same as . myscript, but . myscript is exactly the same as source myscript


Do you have a preferred method for executing shell scripts and if so, why? Let me know below.


Cannot find unread emails in Gmail inbox

I have had quite a few customers calling over the years to say that they cannot find unread emails in their Gmail inbox. It’s a common complaint and one which I have found can be quickly cured by doing the following.

Logon to Gmail in your browser (Chrome, Firefox, Internet Explorer, Safari etc).

Go to the search bar at the top of the Google page (the one with the blue and white ‘magnifying glass’ search button that looks like this):

cannot-find-unread-email-inbox-gmail

In that box, type this:

is:unread in:anywhere

Note that there is a space after the word ‘unread’ but not anywhere else. Copy and paste my text above if you aren’t sure.

Now press enter and you should see all of your unread emails! You can click to read individual ones or select them using their check boxes and then do ‘More’, then ‘Mark as read’.

Try some new search terms to get more out of Gmail

If you want to take things further, there are lots of useful search ‘operators’ that you can use within Gmail too. Get used to using these and you’ll open up a whole new level for this great email tool. Here’s a list of the most popular ones:


What you can search bySearch operator & example
Specify the senderfrom:

Example: from:amy

Specify a recipientto:

Example: to:david

Words in the subject lineSubject:

Example: subject:dinner

Messages that match multiple termsOR or { }

Example: from:amy OR from:david

Example: {from:amy from:david}

Remove messages from your results-

Example: dinner -movie

Find messages with words near each other. Use the number to say how many words apart the words can beAROUND

Example: dinner AROUND 5 friday

Messages that have a certain labellabel:

Example: label:friends

Messages that have an attachmenthas:attachment

Example: has:attachment

Messages that have a Google Drive, Docs, Sheets, or Slides attachment or linkhas:drive

has:document

has:spreadsheet

has:presentation

Example: has:drive has:document

Messages that have a YouTube videohas:youtube

Example: has:youtube

Messages from a mailing listlist:

Example: list:[email protected]

Attachments with a certain name or file typefilename:

Example: filename:pdf

Example: filename: homework.txt

Search for an exact word or phrase" "

Example: "dinner and movie tonight"

Group multiple search terms together( )

Example: subject:(dinner movie)

Messages in any folder, including Spam and Trashin:anywhere

Example: in:anywhere movie

Search for messages that are marked as importantis:important

label: important

Example: is:important 


Starred, unread, or read messagesis:starred

is:unread

is:read

Example: is:read is:starred

Messages that include an icon of a certain colorhas:yellow-star

has:blue-info

Example: has:purple-star

Recipients in the cc or bcc fieldcc:

bcc:

Example: cc:david

Note: You can’t find messages that you received on bcc.

Search for messages sent during a certain time periodafter:

before:

older:

newer:

Example: after:2004/04/16

Example: before:2004/04/18

Search for messages older or newer than a time period using d (day), m (month), and y (year)older_than:

newer_than:

Example: newer_than:2d

Chat messagesis:chat

Example: is:chat movie

Messages delivered to a certain email addressdeliveredto:

Example: deliveredto:[email protected]

Messages in a certain categorycategory:

Example: category:updates

Messages larger than a certain size in bytessize:

Example: size:1000000

Messages larger or smaller than a certain size in byteslarger:

smaller:

Example: larger:10M

Results that match a word exactly+

Example: +unicorn

Messages with a certain message-id headerRfc822msgid:

Example: rfc822msgid:[email protected] 

Messages that have or don’t have a labelhas:userlabels

has:nouserlabels

Example: has:nouserlabels 

Note: Labels are only added to a message, and not an entire conversation.

Credit for search operator list:  https://support.google.com/mail/answer/7190?hl=en


How to unzip files contained in a zip archive

Many people struggle when faced with a zip file and don’t understand what to do with it. I’ll try to explain and look at options for different devices.

Why use zip and what is it?

When you want to download large or small files to your Windows or Mac PC or tablet computer, the standard format is a compressed file such as zip. There are other compressed file formats such as rar, gzip, 7-zip and many others, but they are all effectively a ‘container’ for the files that you ultimately want to download.

how to unzip 7zipWe use zip to reduce the overall file size and make the transfer over the internet much quicker. The files can then be extracted from their container (the zip file) by ‘unzipping’. This is also known as extracting or decompressing. To do this, we use a utility program such as 7Zip.  There is also built-in unzipping in Windows XP, Vista, Windows 7 and Windows 8, although it is not as competent as the 7zip program. 7zip is completely free, it’s stable and reliable and it can be installed on any Windows computer. Download it here:

https://www.7-zip.org/  (opens in a new window for you).

Make sure you get the correct version for your computer, there are 2 versions – 32 and 64 bit. If in doubt, get the 32 bit.

Using 7Zip to compress and extract files

Look at this video that explains both in detail:

How do I unpack zipped or compressed files on my Android device?

The Android operating system does not come with an unzipping program but you can download them from Google Play. Look at WinZip, AndroZip File Manager or WinRAR. As usual, note that some applications on Google Play are free but many carry advertising or a hidden price.

To download and install them, visit Play Store from your Android device’s home screen. Check user reviews if you are unsure which to go for.

Personally, I like to unzip the files on my desktop PC and send them to the tablet using a file sharing and syncing utility such as Dropbox (free) or the excellent Livedrive (Free trial). This type of seamless file sharing is such an aid to moving files around devices you own and also backs up these files in ‘the cloud’.

Using WinZip to create a zip archive

WinZip is proprietary software that has an evaluation period. This allows you to use the program for free for a limited time, after which you should purchase a licence.

For Windows 7, Windows 8 or Vista

Tip – hold down Ctrl and left click to select multiple files at once.

  • Open WinZip and select Add files
  • Choose the first file you want to add and click Zip
  • Choose a name and where to save your zip archive then click Create
  • Click Add files to choose another file Zip to add it to the archive
  • Repeat until all of your files have been added

For Windows XP

  • Open WinZip and select New
  • Choose a name and where to save your zip archive then click Ok
  • Choose the first file you want to add and click Add
  • To add more files, click the Add button in WinZip and choose another file

Using 7-Zip to create an archive

7-Zip is free software that allows you to create and view many types of archive formats including zip.

Tip – hold down Ctrl and click to select multiple files at once.

  • Select the files on your computer
  • Right click on the highlighted files and choose 7-Zip then Add to archive
  • Under Archive choose a name for your file and where you want to save it
  • Change the archive format to zip, everything else can be left as the default values
  • Click Ok


Hope this helps you to understand and use zip files.


Who or what is root@notty?


root notty whm ssh hackedIf you’re looking through WHM’s process manager and you see root@notty mentioned as one of the processes, don’t be alarmed. It’s perfectly normal and it’s definitely not some hacker called ‘Notty’ who has suddenly got root permissions. Be honest, you’re here because you thought that 😉

You may also have seen sshd: root@notty in the output of ps aux too.

Why notty?

The term ‘notty’ just represents ‘no tty’ which roughly translates as meaning ‘no terminal’. When you login locally to any Linux machine the terminal will always appear in the process list as ‘tty’. If a connection is made via SFTP or you are copying files with SCP (as I did here on a test server prior to bringing up the screenshot above) then it will show as no tty (notty).

Where does TTY come from?

Many years ago, user terminals that were connected to computers were clunky and noisy Electro-mechanical Teleprinters also known as Teletypewriters. They took the latter phrase and chopped some characters out to get the TTY abbreviation:

TeleTYpewriter = TTY

Since then, TTY has been used as the shortened name for a text-only console. Here’s a teletypewriter in action:


Now you can’t say that things haven’t progressed!


Outlook emails stay in Outbox after Windows 10 upgrade

email-settings-pop-imap-btconnect-outlookAre you getting your Outlook emails stuck in your Outbox after upgrading to Windows 10? I’ve seen this happen on several machines and it really seems to be a problem where Windows corrupts the Outlook database and/or profile on many versions of Microsoft Office (2007, 2010 and 2013). The easiest fix and one that I’d recommend here is to delete or move the stuck emails then close all programs that are open such as Outlook.
Now we can use the in-built Windows “System File Checker” that will scan your PC and repair any corrupt files that it finds. To do this:

  • Click Start
  • Type cmd in the Search box
  • Right-click Command Prompt and then click ‘Run as administrator’. If you are prompted for an administrator password or for a confirmation then type the password or click ‘Allow’
  • In this black window (the command prompt) that appears, type in sfc /scannow noting the space before the forward slash
  • Press enter and go and grab a delicious cup of coffee because this will take a while

Note: Do not close this Command Prompt window until the verification is 100% complete. The scan results will be shown after this process is finished.

Technical information for nerds
The sfc /scannow command will scan all protected system files, and replace corrupted files with a cached copy that is located in a compressed folder at %WinDir%\System32\dllcache.
The %WinDir% placeholder represents the Windows operating system folder. For example, C:\Windows.

The time taken to complete this scan is different on every PC but usually can range from 20 minutes to an hour or more. If it solves your problem (which it has on over 50 client PCs to date) then please take a minute to drop a comment below or maybe buy something through our shop to say thanks.


Country codes for mod_security, CSF and htaccess

Her’s a list of useful country codes that we can use in many rule-based filtering situations on servers.

AD Andorra
AE United Arab Emirates
AF Afghanistan
AG Antigua and Barbuda
AI Anguilla
AL Albania
AM Armenia
AN Netherlands Antilles
AO Angola
AQ Antarctica
AR Argentina
AS American Samoa
AT Austria
AU Australia
AW Aruba
AZ Azerbaijan
BA Bosnia and Herzegovina
BB Barbados
BD Bangladesh
BE Belgium
BF Burkina Faso
BG Bulgaria
BH Bahrain
BI Burundi
BJ Benin
BM Bermuda
BN Brunei Darussalam
BO Bolivia
BR Brazil
BS Bahamas
BT Bhutan
BV Bouvet Island
BW Botswana
BY Belarus
BZ Belize
CA Canada
CC Cocos (Keeling) Islands
CF Central African Republic
CG Congo
CH Switzerland
CI Cote D’Ivoire (Ivory Coast)
CK Cook Islands
CL Chile
CM Cameroon
CN China
CO Colombia
CR Costa Rica
CS Czechoslovakia (former Republic)
CU Cuba
CV Cape Verde
CX Christmas Island
CY Cyprus
CZ Czech Republic
DE Germany
DJ Djibouti
DK Denmark
DM Dominica
DO Dominican Republic
DZ Algeria
EC Ecuador
EE Estonia
EG Egypt
EH Western Sahara
ER Eritrea
ES Spain
ET Ethiopia
FI Finland
FJ Fiji
FK Falkland Islands (Malvinas)
FM Micronesia
FO Faroe Islands
FR France
FX France, Metropolitan
GA Gabon
GB Great Britain (UK)
GD Grenada
GE Georgia
GF French Guiana
GH Ghana
GI Gibraltar
GL Greenland
GM Gambia
GN Guinea
GP Guadeloupe
GQ Equatorial Guinea
GR Greece
GS S. Georgia and S. Sandwich Isls.
GT Guatemala
GU Guam
GW Guinea-Bissau
GY Guyana
HK Hong Kong
HM Heard and McDonald Islands
HN Honduras
HR Croatia (Hrvatska)
HT Haiti
HU Hungary
ID Indonesia
IE Ireland
IL Israel
IN India
IO British Indian Ocean Territory
IQ Iraq
IR Iran
IS Iceland
IT Italy
JM Jamaica
JO Jordan
JP Japan
KE Kenya
KG Kyrgyzstan
KH Cambodia
KI Kiribati
KM Comoros
KN Saint Kitts and Nevis
KP Korea (North)
KR Korea (South)
KW Kuwait
KY Cayman Islands
KZ Kazakhstan
LA Laos
LB Lebanon
LC Saint Lucia
LI Liechtenstein
LK Sri Lanka
LR Liberia
LS Lesotho
LT Lithuania
LU Luxembourg
LV Latvia
LY Libya
MA Morocco
MC Monaco
MD Moldova
MG Madagascar
MH Marshall Islands
MK Macedonia
ML Mali
MM Myanmar
MN Mongolia
MO Macau
MP Northern Mariana Islands
MQ Martinique
MR Mauritania
MS Montserrat
MT Malta
MU Mauritius
MV Maldives
MW Malawi
MX Mexico
MY Malaysia
MZ Mozambique
NA Namibia
NC New Caledonia
NE Niger
NF Norfolk Island
NG Nigeria
NI Nicaragua
NL Netherlands
NO Norway
NP Nepal
NR Nauru
NT Neutral Zone
NU Niue
NZ New Zealand (Aotearoa)
OM Oman
PA Panama
PE Peru
PF French Polynesia
PG Papua New Guinea
PH Philippines
PK Pakistan
PL Poland
PM St. Pierre and Miquelon
PN Pitcairn
PR Puerto Rico
PT Portugal
PW Palau
PY Paraguay
QA Qatar
RE Reunion
RO Romania
RU Russian Federation
RW Rwanda
SA Saudi Arabia
Sb Solomon Islands
SC Seychelles
SD Sudan
SE Sweden
SG Singapore
SH St. Helena
SI Slovenia
SJ Svalbard and Jan Mayen Islands
SK Slovak Republic
SL Sierra Leone
SM San Marino
SN Senegal
SO Somalia
SR Suriname
ST Sao Tome and Principe
SU USSR (former)
SV El Salvador
SY Syria
SZ Swaziland
TC Turks and Caicos Islands
TD Chad
TF French Southern Territories
TG Togo
TH Thailand
TJ Tajikistan
TK Tokelau
TM Turkmenistan
TN Tunisia
TO Tonga
TP East Timor
TR Turkey
TT Trinidad and Tobago
TV Tuvalu
TW Taiwan
TZ Tanzania
UA Ukraine
UG Uganda
UK United Kingdom
UM US Minor Outlying Islands
US United States
UY Uruguay
UZ Uzbekistan
VA Vatican City State (Holy See)
VC Saint Vincent and the Grenadines
VE Venezuela
VG Virgin Islands (British)
VI Virgin Islands (U.S.)
VN Viet Nam
VU Vanuatu
WF Wallis and Futuna Islands
WS Samoa
YE Yemen
YT Mayotte
YU Yugoslavia
ZA South Africa
ZM Zambia
ZR Zaire
ZW Zimbabwe

A few lesser-used ones below, but for completeness here they are:

ARPA Arpanet
COM US Commercial
EDU US Educational
GOV US Government
INT International
MIL US Military
NATO Nato field
NET Network
ORG Non-Profit Organization


Kaspersky Pure replaced by Total Security

Since I am getting a lot of questions on where Kaspersky Pure has gone and how to upgrade, I’ll try to clarify a few things. Yes, the main Kaspersky.com website has now dropped Pure as a product, seemingly without notification. The localized websites (such as .co.uk etc) have followed too. It seems that Kaspersky Pure has been phased out in favour of ‘Total Security’. There are a lot of Pure installation CDs out there so what to do?

OK, so here comes the terminology first:

  • KTS stands for Kaspersky Total Security
  • KIS stands for Kaspersky Internet Security
  • KAV stands for Kaspersky Anti-Virus
  • Changing from one installed product to another is called ‘migrating’

If you have an active or expired Kaspersky PURE 2.0 or 3.0 license, you have special options of migrating to Kaspersky Total Security. You can also migrate to Kaspersky Total Security from Kaspersky Internet Security and Kaspersky Anti-Virus or vice-versa.

Who can’t upgrade to Kaspersky Total Security?

Note that free migration to Kaspersky Total Security is not possible for the oldest versions of Pure. These were the original ‘version 1’ programs but are called:

Kaspersky PURE
Kaspersky PURE R2 (note that this is NOT the same as Kaspersky Pure 2.0)

They can’t be upgraded because their activation codes are incompatible with Kaspersky Total Security.

Now we know what versions can’t be upgraded, let’s upgrade those that can…

Free upgrades to Total Security

Successful upgrading depends on the current status of your license:

  • If you have an active licence for Kaspersky PURE 2.0 or Kaspersky PURE 3.0, you can simply use your current activation code for migration (upgrading) to Kaspersky Total Security.
  • If your license for Kaspersky PURE 2.0 or Kaspersky PURE 3.0 has expired, you can visit my shop here to buy Total Security at a cheaper price than renewal, then install it which migrates the licence for you automatically.

Migrating the Pure licence key to Total security

If you have Kaspersky PURE 2.0 or Kaspersky PURE 3.0 installed on your computer, do the following to upgrade to Kaspersky Total Security:

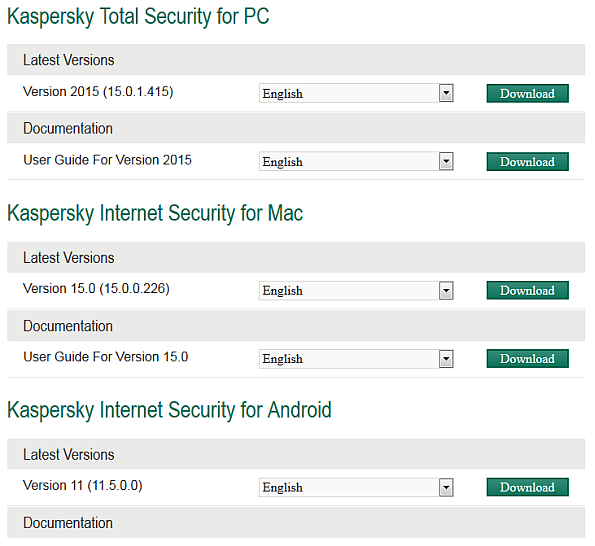
Download the Total Security package here (opens in a new window for you). This is what you should see:

kaspersky download total security

Grab the top one in my screenshot above, Total Security, and download it. Now we have 2 options, either installing over the top of Pure or removing Pure and installing your downloaded KTS. I have listed both below:

Option 1 – Install Kaspersky Total Security without removing Kaspersky PURE

When you install Kaspersky Total Security on top of Kaspersky PURE 2.0 or Kaspersky PURE 3.0, the following data is preserved:

  • License information
  • Quarantined objects
  • Product settings (config settings including Backup tasks)
  • Encrypted containers (including all data)
  • Password Manager databases for all user accounts. All data that was available when working with Password Manager, such as passwords to programs and accounts, identities, notes, etc.
  • Anti-Spam databases (if the Anti-Spam component was previously used)
  • Backup stores

This makes it the easier option for most users. If you are not experiencing any issues with Pure then do this. If you have slowdown issues, configuration problems or just want a fresh install (which is always nicer) then jump to Option 2 below.

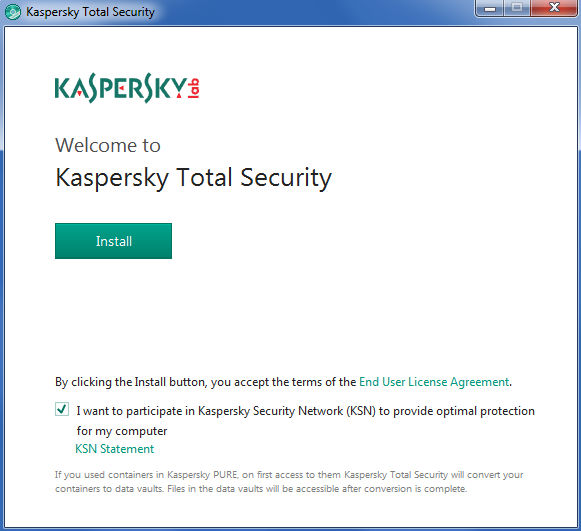
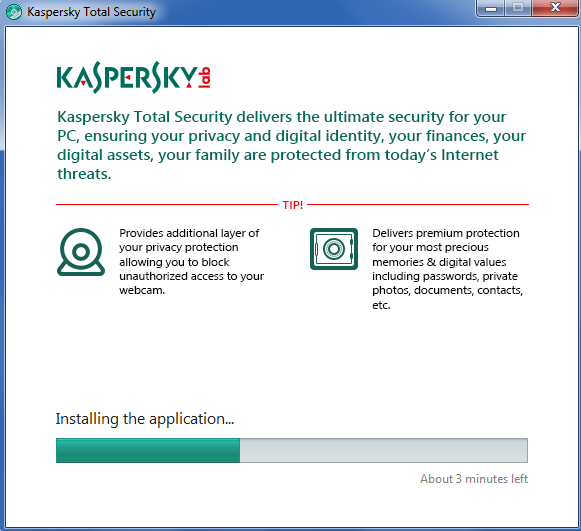
Screenshots of the installation process when installing over Kaspersky Pure:

install-kaspersky-total-security

installing-total-security

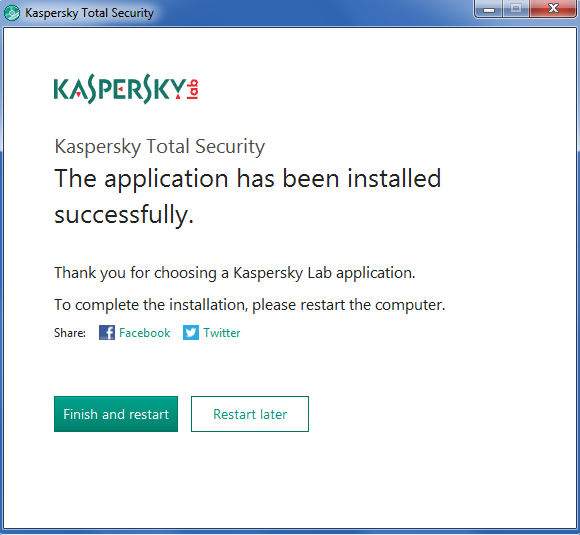
finish-restart-total-security

This took about 3 minutes for us to complete including the restart, just accept the defaults.

Option 2 – Install Kaspersky Total Security, removing Kaspersky PURE first

CAVEAT – You must have your licence key available which can be found on the card inside the product case.

CAVEAT 2 – You will lose any saved passwords in the Kaspersky Password Manager. Not everyone uses this and it won’t affect other password managers such as LastPass, Roboform, Keepass etc.

CAVEAT 3 – You will lose any quarantined files, backup stores, encrypted containers and spam databases (if used) which are again specific to Kaspersky Pure

  • Fully uninstall Kaspersky Pure via your control panel.
  • Reboot your PC
  • Install Total Internet Security from the file you downloaded earlier or from a packaged CD

If you have never installed a program before, here is some help how to do it:


I hope that this helps answer your questions on installation, upgrading and compatibility. Kaspersky remains the most effective of all the antivirus and Internet security suites that we have tested in our workshop and Total Security is a worthy replacement for Pure.