Can Cat 5 cable achieve Gigabit speeds?

cat5-vs-cat6-vs-cat7-ethernet-cables

I was asked this question twice this week so thought I’d clarify a few things. Cat 5 and Cat 5e cable (note the ‘e’ for ‘enhanced’) can certainly achieve Gigabit speeds, this is what it was designed for. This is achievable but only when all twisted pairs are used and you have short run lengths. The reality of being able to push Gigabit speeds from other equipment on the line has to be addressed too, don’t focus solely on the cable.

Most new PC equipment over the last few years can do these speeds but there are some new PCI Gigabit network cards that I have tested and they are a way off data transmission at 500Gbps, let alone Gigabit.

Clearing up the terminology

I’ll break here to look at quickly at speed terminology in a little more detail as there is lots of confusion here for non-techy people. First off, let’s define speed and fix a common mistake. Take a speed of “100MB/sec” what does this represent? Well, it means that you achieve 100 MegaBytes per second (important to note the large B in there). Since there are 8 bits in a Byte, we are actually achieving 800Mbps (800 Megabits per second). Got it?

Older Ethernet equipment typically ran at 10/100 speeds. The big jump from 100M bit/sec to Gigabit is accomplished by a few special signal changes that can take additional advantage of the Cat5 cable, so if you already have this installed then you may be in luck. Here’s the caveat though:

Cat 5 cable is typically unshielded twisted pair and it contains four twisted wire pairs. Fast Ethernet (10Base-T and 100Base-T) use only two of these pairs whereas Gigabit Ethernet (1000Base-T) uses all four pairs. “So use all four pairs in my Cat 5 cable and I’ll be OK?” I hear you ask. Well, caveat number 2 is that you need to keep your run lengths down. For most domestic installations you will be fine if you already have Cat5 installed as the run lengths can have little speed difference if kept around 10 metres max length (quoting from my own experience here). If you have longer cable lengths then you need to consider upgrading to Cat6, although you should do a speed test first. Personally, I’d go for Cat7 (Class F as it’s officially called) and get some future proofing in there, especially if starting from scratch.

Do bear in mind also that the quality of the cable can vary, so try to go with one that has good reviews or one from a reputable supplier if possible.

Is 10Gb/sec possible on twisted pair cables?

The current 1000Base-T specification only supports 100 metre runs of cabling and to get to the IEEE proposed 10Gb/sec we will definitely require fibre. Even the 10Gb comms across fibre have a suprisingly low limit of just 85 metres.

Summary

Cat5e seems to be giving about the most bang for your buck in most countries. I’d estimate that most domestic households won’t come anywhere near the throughput of that for quite a few years to come, but if you have the extra money or want to future-proof as much as possible then Cat7 will be a good alternative.

Hope this helps you to choose your cables!


AVG update crashes PC, how to restart Windows after avgidseh.sys error

Manifesting as an avgidseh.sys error, one of the AVG updates has proven to be a problem for several PC setups recently. It seems more prevalent on Windows 7 64 bit setups but also affects many other Windows systems.  Symptoms are PCs that will not boot after an AVG update, offering a Blue Screen Of Death (BSOD) on restart.
The problem is down to an AVG  system file that is loaded at boot time – most notably Windows\System32\Drivers\avgidseh.sys

The avgidseh.sys hang fix

The technical fix is to rename all files in the \Windows\System32\Drivers folder that begin with “avg” to something else. We do this by running off a boot CD/DVD/USB. Basically, any boot disk that allows file management access can do this.  Note: Safe mode will not help here.

Use a free rescue CD to rename the AVG  files

AVG offer a rescue CD that can do this as it includes Midnight Commander as a file management tool. Download it from here

Here is a video that should help you to fix your PC using AVG’s solution and a spare USB pen drive or recordable CD.  You will need to do this from a working PC initially (eg. a friend’s or a work computer).

Once done, restart the PC and AVG will no longer start. Now you can use your control panel’s Add/Remove programs feature to completely remove AVG and reinstall it. The new updates do not appear to be affected so it should work as normal.

On many PCs, the AVG boot CD will automatically restart, even after the error has been fixed.  This is simply because you have settings that default to booting from a CD in preference to your hard drive.  In this case, you will need to remove the CD from the drive, otherwise you’ll get stuck in a loop of starting up from the CD every time.  The CD is best removed by pressing the button when your PC has shut down, just before it restarts.  If you have used a USB pen drive then remove this just before restart as detailed above.

Next, do yourself a big favour, download, install and run the MalwareBytes’ Antimalware program from here. This is a big one.  This will satisfy yourself that there is nothing malicious on the PC that may cause AVG to misbehave or crash. It runs quite happily alongside AVG and makes your antivirus/antispyware setup much stronger, catching things that AVG misses. I have linked to the paid version of MalwareBytes because it tracks your system in real time, keeping spyware and malicious websites away.  It is singlehandedly the best tool I recommend to run alongside AVG and is very cheap for the performance it has.

UPDATE
Since I wrote this article, there have been faults other than the update fault listed above. Although the method used above remains acceptable, AVG have modified their boot CD. See my revised avgidseh.sys boot error article  for further information and possible cures.


2 Terabytes of backup storage for life only $45

zools-lifetime-backup-2tb-offer-cheapest

It’s becoming increasingly difficult to keep up with the ever-changing world of physical information storage. New hard drives and flash drives are constantly hitting the market and obsolescence is inevitable. There has never been a better time to store your data in the cloud, and cloud security has also never been better.

Get 1TB of cloud storage for just $45!

Cloud services, however, can be costly or they just don’t offer enough storage. You need a service that’ll securely back you up for life, and you need a service that won’t cost you thousands a year because you need terabytes of storage. This is especially prudent in a business scenario where you may have to provide cloud storage to multiple employees.

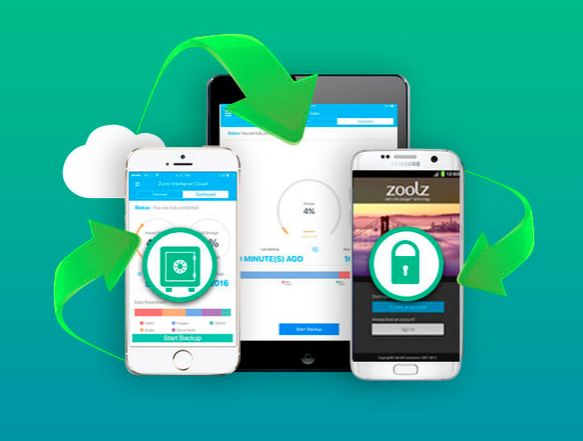
Zoolz Cloud Storage offers an elegant solution. You can get 1TB of cloud storage for data you access regularly PLUS with 1TB of cold storage that lets you store those important files you can’t afford to lose. The Instant Vault is easy to use — just drag and drop files via a web browser. The cold storage will allow you to automatically back up two devices at one time.

Store all of your most important files in a secure cloud

You can get 1TB of highly secure cloud storage data for just $45. Zoolz typically charges $3,600 for a lifetime subscription, but you won’t pay anywhere near that much. Incredible but true, you can save an amazing 98% with this time limited offer and back up all your data now!

Choose your desired package


Accuranker review 2019

accuranker review coupon 2019 2020


Accuranker is a very impressive tool that helps you to accurately monitor keywords for your websites. We were that impressed that we now run this tool daily and wanted to put together a mini Accuranker review.

This tool is aimed at users with single websites, right up to agencies with hundreds of sites. You can see at a quick glance how your keywords are performing daily, and you don’t even need to run a report, you can see live data on the website or get scheduled reports sent through to you by email.

Initial Accuranker setup

Initial setup is simple, just choose Google or Bing (or both) and select desktop or mobile (or both) to see how your keywords perform on these devices. Your package will include a limited number of keywords and this is different for each subscription level. Note that if you have, for example, a site with 10 keywords tracked, then checking results for Google Desktop counts as 10 keywords. If you add Google mobile too, this would then count as 20 keywords. Add Bing desktop and mobile into the mix and you’ll be up to 40 keywords. It’s easy to forget this when ordering a package, so make sure you get the right one for you. Their keyword allowance is quite generous though, especially given that Accuranker check them daily by default.

Google analytics linking

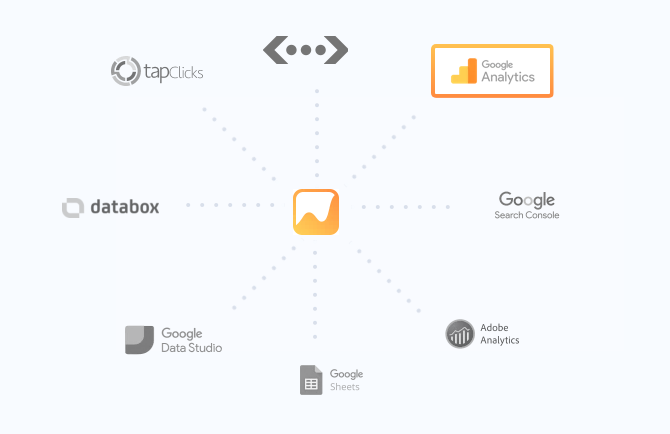
Impressively, this tool links into your Google Analytics account to pull even more data for you. As you can see from their image below, you can integrate with many more services such as DataStudio, Sheets and more:

accuranker review discount

So with this tool you can now see your ranking in the Search Engine Results Pages (SERPs). The graphing software on the site is impressive, allowing you to drill down into each keyword’s ranking history with a few clicks.

Accuranker updates, good or bad?

AccuRanker is maintained by some clever people and updates come through quite regularly adding new functionality. All the updates we have seen have been useful and have added more value to the tool. You can also take advantage of their 14-day free trial to see if it is the right SEO tool for your needs.

An SEO tool for agencies

Agencies will love the automatic monitoring and reporting features. You can even send a scheduled report out to your clients, a great bonus. Different data export formats will suit most agencies (and beginners too). If you’re still using Excel and CSV for your reporting or metrics then this is easily available for export.

Competitor Monitoring

One great SEO trick is checking how your keywords stack up against the same ones for other websites. Accuranker monitors keyword competition and lets you know who ranks higher than you, which is great for beating your competitors. Accuranker also uses “Share of Voice” which is a cool name for their trickest feature. This allows you to view who has more share of the search engine results for given keywords. It’s a great metric to quickly see if you are pushing your competitors further away or if they’re catching you up.

Verdict

All in all, the clear layout, the impressive charting and reporting make this package the best we have seen for SEO reporting. We now use it daily to monitor and track our keywords too.

With a 14-day free trial, clear navigation and simple yet effective reporting, AccuRanker is now the keyword tracking SEO tool to beat.


Test Accuranker now


HDD Regenerator review

HDD Regenerator reviewIt’s difficult for us to write an unbiased HDD Regenerator review because we use it all of the time in our repair shop.  It’s the single best tool out there for repairing corrupt hard drives, and we get lots of them in. That said, we’ll try to remain objective and give an honest review.

If I mention that we get on average 10 to 15 corrupt drives a week through our medium sized repair shop alone, then you’ll see why this is such a big problem. For you to decide whether it’s right for you, you first you may need to understand what happens to corrupt a hard drive and why your PC won’t start when there is corruption on the disk.

What is hard drive corruption?

Hard drive corruption happens quite often to laptop and desktop computers. This is generally because of a few things:

  1. The battery going completely flat (in laptops) or a sudden power cut before the system has had time to write all of its data to the hard disk
  2. Knocks or bumps to a laptop or desktop PC while in use
  3. The hard drive is mechanically failing.

The result is a hard drive that has one or more areas on it which are unreadable (known as ‘bad sectors’). These sectors may contain your data, such as documents or images, or a file that your operating system (Windows, Linux, Mac etc.) needs to read information from. If it’s a Windows file, then the whole installation is effectively rendered useless as Windows cannot start. Likewise Mac or Linux will refuse to power up. This can happen to computers, often when the power is suddenly cut or a software crash occurs. The dreaded ‘Blue Screen of Death’ can also result in drive errors.

How do I know if my hard drive has a fault or is corrupted?

Symptoms of this type of error are computers that boot so far into Windows then display a black screen. Many will restart automatically and end up ‘looping’. This is because Windows cannot find the files it requires, throws an error and your PC will restart automatically on seeing that error. Even safe mode will usually do this looping, a sure sign that you need a software tool to repair the hard drive’s bad sector errors.

The majority of hard drives with bad sectors have an incorrectly magnetized disk surface. Fortunately, there are solutions and the clever guys at Abstradrome have developed an algorithm which is used to repair damaged disk surfaces. This technology supports many types of hard disk drives and can repair damage that even low-level disk formatting can’t repair. Because of the way the repair is made, the existing information on the hard drive (e.g. your data and the important Windows files) will not be affected.

For our repair shop where we repair Linux and Mac devices as well as Windows this is simply a brilliant, cross-platform tool.

HDD Regenerator review – the features

Let’s look at the features and benefits of this software

Program features

  • It can detect physical bad sectors on a hard disk drive surface.
  • It is able to repair bad sectors (magnetic errors) on a hard disk surface.
  • The product ignores your file system and scans the disk at physical level.
  • It can be used with FAT, NTFS or any other file system
  • It can read and repair unformatted or unpartitioned disks.
  • Starts within Windows environment (XP/Vista/7/8/10)
  • Bootable CD or USB flash drive allows the HDD Regenerator to work on a non-starting PC

This is an impressive feature set. The manufacturer also offers:

  • A no-quibble 30 day money back guarantee
  • Unlimited license period
  • Free 1 year minor upgrades (although the software works on all drives exceptionally well)
  • Large discounts on major upgrades

Main benefits

When a hard drive is damaged with bad sectors, the disk not only becomes unfit for use as there are areas which are damaged that you will ultimately write data to.  You then also risk losing information you have already stored on it. HDD Regenerator REPAIRS damaged hard disks without affecting or changing existing data so it is one of only a few tools that can actually do this task.  Currently we have found no products that outperform this one, so it is worth the investment.

Downloading the disk repair software

Purchase and download a copy and install it to a working Windows computer. You can then create a bootable CD, DVD or flash drive that will run on your problem computer and scan the drive for bad sectors, the most common hard drive error that we see in our workshop.

If you’re a bit confused by this, the term ‘bootable’ means that it starts up from your computer and runs WITHOUT using your hard disk drive that has Windows on it. Clever stuff!

So, the program takes about 1 minute to install and, when started, it immediately scans the disk(s) on the PC it is installed on. This is no problem if it is installed on a friend’s or family member’s PC as it will be simply carry out a very quick scan of the ‘SMART’ data on the drive. What we now need to do is to create a bootable CD to insert on the dead (or dying) PC.

Create a bootable CD, DVD or USB pen drive

hdd regenerator 2019 fix drive error

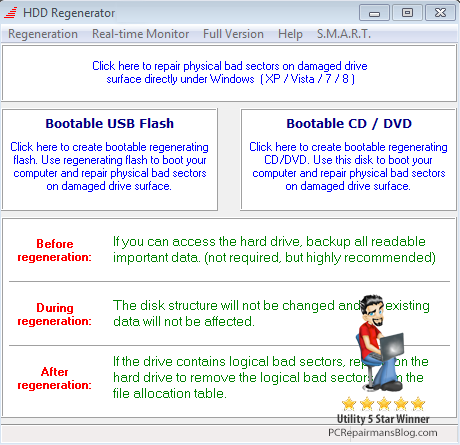
Open the program from the tray icon (bottom right of the screen) or from the Programs menu’.  Select the bootable flash drive or CD/DVD option. Follow the on-screen prompts until you have created your bootable medium.

Insert this bootable media into your problem computer and run a full scan and repair. It could a few hours depending on the size of the hard disk and the speed of the computer.

Can HDD Regenerator repair my hard drive?

The vast majority of damaged hard disks can be repaired by regeneration and there is a full money-back guarantee if you’re not satisfied. If the first found bad sector has been successfully regenerated, it is very promising and you can generally regenerate all bad sectors on your hard drive. If the first bad sector has NOT been successfully regenerated, then you will probably need to recover your data and replace your hard disk drive as soon as possible. A few bad sectors is acceptable but more than a few and we suggest replacing the hard drive because it will fail imminently. The latest generation of SSD drives give a significant speed increase to most systems, they are relatively cheap and you can copy over your data once recovered.

Personally we would advise purchasing this tool over any others currently on the market as the success rates are so high. HDD Regenerator is available direct from the vendor here at a price we think is a bargain for the power of the software:


If you wish to add your personal experiences to this hdd regenerator review, please contact me via the site or drop a comment below.


Install Irfanview and resize images easily

Here’s a quick tutorial how to resize images quickly and easily using a great free program called Irfanview.

First, if you haven’t already, download and install Irfanview from https://www.irfanview.com

When starting the program for the first time go to the top menu and select:
Options > Set file associations > Images only > OK
Now all images will open in this nifty program, it’s good and fast.

Note that with the latest Windows 10 updates, you need to go to Settings > Default Apps and set IrfanView as your default viewer. Some Windows updates are known to actually remove IrfanView altogether!

Resizing an image with Irfanview

Resizing images really depends on what you want to achieve as an end result. There are a few common scenarios here:

  1. You want to resize pictures to keep the file size down because you are sending by email. This option is usually when sending family pictures or work images to a colleague.
  2. You want to create an avatar, logo or smaller image from the original image.
  3. You want to crop a section of the image and resize it afterwards.

In each of these cases, we shall be using the resize dialog box so let’s see how to open this now.

Open Irfanview from the shortcut or All Programs menu, and click on File > Open.

In the box that opens, navigate to the image you want to resize. Double click it or click on the Open button.

The image will open up in the main Irfanview window.
Irfanview resize image tutorial

From the toolbar menu at the top, click Image and select Resize/Resample. This will open the Resize/Resample image dialog box which is where you will select the settings that will be applied to your final image.

Now we want to either use some of the handy presets you see to the right side or manually add our image sizes. Think of 800 x 600 pixels as a landscape orientation, postcard sized image and you won’t be far wrong. This is an ideal size to send pics to family and friends by email and not have them clogging up their inbox. Most digital cameras now have extremely high pixel count so your original could be something like 2992 x 2000. This is obviously a landscape image because the first figure quoted is always the width, the second being the height. Resizing this image to 800 x 600 would work as landscape photos are generally close to a 4:3 ratio (although that example of 2992 x 2000 is not quite 4:3). Because some stretching of the image would occur in that case, we can actually check the box preserve aspect ratio. Now, typing in your desired width should alter the height accordingly and vice versa, resulting in a non-stretched image. It’s up to you if you want to apply sharpen after resample, this is generally better when going to a very small image such as used for icons and avatars, so I would generally avoid it for larger photos. For images on web pages such as WordPress powered sites, a width of 500 pixels (px) is usually sufficient for the content areas, going down to 150 px where we are wrapping text around the image.

In the Size Method box, put a tick next to Resample (better quality), and using the dropdown arrow, select Lanczos filter (slowest). What we are doing when resizing is effectvely getting rid of pixels, so the image needs to have a degree of loss applied to it that the human eye can’t see that well. The jpeg format is called a ‘lossy’ format for this reason. When you see a pixellated image, this is generally because it has been compressed a bit too much and too many critical pixels have been lost.

When you have the settings the way you want them, click on the OK button. Irfanview renders the image in its new size, although it may still be zoomed in or out. Use the + or – magnifying glass on the toolbar to zoom in or out until you see 100% displayed on the lower toolbar of Irfanview. This is your actual image size, as rendered by your monitor.

IMPORTANT NEXT STEP

You currently have the resized file in the main Irfanview window but it isn’t saved. Most photographs are better quality when they are original and making them smaller reduces quality, so we generally don’t save the image at this point. We do a File > Save As. Think of this as duplicating the file and you won’t go wrong, we are saving another copy of the image but in a different size. You have the chance to navigate to a new folder (I usually create one called Resized) and save the image with a descriptive name, something like:

dave-birthday-party-may-2014.jpg

I like to keep all filenames lowercase and separate words with hyphens as it’s much better for search engines and for web server semantics when uploaded to the web.

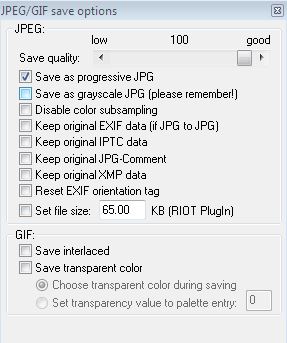
Saving in Jpeg format is generally good for photos, it results in smaller file sizes. Slide the quality slider up to 100 for best quality though.

Resize image irfanview jpeg quality

Now all that remains is to click on Save and you are done.

I hope that helped to clear up a bit of resizing mystery, please drop me a comment below if you have any questions or just to let me know it helped.




Lowest prices on Norton Antivirus renewals

cheap norton security discountBeing asked often about where to find the lowest priced Norton Antivirus renewal made me come up with this article. Symantec offer a renewal by credit card that is often too pricey for most people. With Norton Anti-virus being a capable product, it’s a shame to uninstall it so here are a few tips to get a new and fully licensed program at a much reduced price. And there’s nothing illegal about it!

You don’t have to uninstall your current product, simply buy another package (at much less than the price to renew your licence!) from our software shop which will open in a new window for you. When you open it up, use the serial number you find inside. Type this into your existing product and you’ll get another 12 months of updates (or more if you buy a 2 year package).

Remember to match the amount of user licences you have, eg if you have 3 PCs buy a 3-user licence.

Not got Norton Antivirus? Click here for the cheapest Norton Internet Security renewal or click here for the cheapest Norton 360 renewal

Don’t forget to ‘Tweet’ or Facebook ‘like’ this article if it saved you some cash! or tell your friends about our low-priced software shop


Who or what is root@notty?


root notty whm ssh hackedIf you’re looking through WHM’s process manager and you see root@notty mentioned as one of the processes, don’t be alarmed. It’s perfectly normal and it’s definitely not some hacker called ‘Notty’ who has suddenly got root permissions. Be honest, you’re here because you thought that 😉
You may also have seen sshd: root@notty in the output of ps aux too.

Why notty?

The term ‘notty’ just represents ‘no tty’ which roughly translates as meaning ‘no terminal’. When you login locally to any Linux machine the terminal will always appear in the process list as ‘tty’. If a connection is made via SFTP or you are copying files with SCP (as I did here on a test server prior to bringing up the screenshot above) then it will show as no tty (notty).

Where does TTY come from?

Many years ago, user terminals that were connected to computers were clunky and noisy Electro-mechanical Teleprinters also known as Teletypewriters. They took the latter phrase and chopped some characters out to get the TTY abbreviation:

TeleTYpewriter = TTY

Since then, TTY has been used as the shortened name for a text-only console. Here’s a teletypewriter in action:


Now you can’t say that things haven’t progressed!


Cheapest Norton 360 renewal

cheap norton security discountI’m frequently asked by customers how to get the cheapest renewal price on Norton 360.  Symantec’s renewal price is really one of the highest for any Internet Security product.  It is a capable package though and worth keeping on your PC. The best way by far is to purchase a new fully licensed program at a reduced price and install that. Nothing underhand, just a new product at a price much lower than Norton currently quote for renewal.

The beauty of this is that you don’t have to uninstall your current product if it is the same ‘family’ as the one you are installing, simply match the product family. For example, if you have Norton Security, get a Norton Security package with any version number as they all qualify for Norton’s free upgrade to the latest version anyway! If you have the older Norton 360 then get Norton Security and uninstall Norton 360 first.

Do Norton really offer a free upgrade?

Yes, most versions of Norton qualify for a free upgrade to the latest version in that product family. If you download the latest installation program, Norton will auto-detect and remove your older version and then install the newer one too, making it even simpler to install.

Please note

You can change to another security software at this point. From doing lots of virus clean-up work and labs testing, I would recommend uninstalling the Norton product and installing my preferred security suite and consistent labs test winner Kaspersky Total Security. Norton is quite capable but Kaspersky definitely has the edge on speed and low resource usage.

A word of warning. Norton products such as Norton 360, Norton Internet Security and Norton Antivirus are now retired in favour of “Norton Security” and “Norton Security with Backup”. Confused? This article explains more: New Norton product family (opens in a new window).

So to recap, if your Norton 360 has expired, then take a look in my software shop (opens in a new tab) and buy either a Norton or Kaspersky product at prices cheaper than Symantec’s renewal rates. If you want to upgrade to another software product (such as Kaspersky) then simply uninstall the existing Norton software, restart the computer and then install the Kaspersky product.

Don’t forget to ‘Tweet’ or Facebook ‘like’ this article if it saved you some cash!

Shop for Norton products now


Kaspersky Pure replaced by Total Security

Since I am getting a lot of questions on where Kaspersky Pure has gone and how to upgrade, I’ll try to clarify a few things. Yes, the main Kaspersky.com website has now dropped Pure as a product, seemingly without notification. The localized websites (such as .co.uk etc) have followed too. It seems that Kaspersky Pure has been phased out in favour of ‘Total Security’. There are a lot of Pure installation CDs out there so what to do?

OK, so here comes the terminology first:

  • KTS stands for Kaspersky Total Security
  • KIS stands for Kaspersky Internet Security
  • KAV stands for Kaspersky Anti-Virus
  • Changing from one installed product to another is called ‘migrating’

If you have an active or expired Kaspersky PURE 2.0 or 3.0 license, you have special options of migrating to Kaspersky Total Security. You can also migrate to Kaspersky Total Security from Kaspersky Internet Security and Kaspersky Anti-Virus or vice-versa.

Who can’t upgrade to Kaspersky Total Security?

Note that free migration to Kaspersky Total Security is not possible for the oldest versions of Pure. These were the original ‘version 1’ programs but are called:

Kaspersky PURE
Kaspersky PURE R2 (note that this is NOT the same as Kaspersky Pure 2.0)

They can’t be upgraded because their activation codes are incompatible with Kaspersky Total Security.

Now we know what versions can’t be upgraded, let’s upgrade those that can…

Free upgrades to Total Security

Successful upgrading depends on the current status of your license:

  • If you have an active licence for Kaspersky PURE 2.0 or Kaspersky PURE 3.0, you can simply use your current activation code for migration (upgrading) to Kaspersky Total Security.
  • If your license for Kaspersky PURE 2.0 or Kaspersky PURE 3.0 has expired, you can visit my shop here to buy Total Security at a cheaper price than renewal, then install it which migrates the licence for you automatically.

Migrating the Pure licence key to Total security

If you have Kaspersky PURE 2.0 or Kaspersky PURE 3.0 installed on your computer, do the following to upgrade to Kaspersky Total Security:

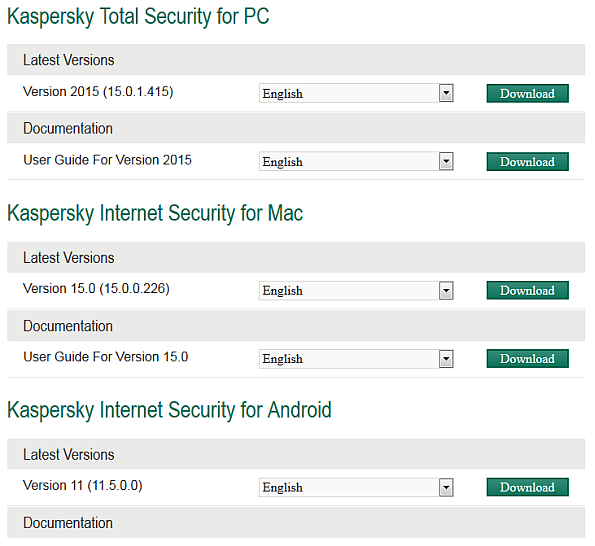
Download the Total Security package here (opens in a new window for you). This is what you should see:

kaspersky download total security

Grab the top one in my screenshot above, Total Security, and download it. Now we have 2 options, either installing over the top of Pure or removing Pure and installing your downloaded KTS. I have listed both below:

Option 1 – Install Kaspersky Total Security without removing Kaspersky PURE

When you install Kaspersky Total Security on top of Kaspersky PURE 2.0 or Kaspersky PURE 3.0, the following data is preserved:

  • License information
  • Quarantined objects
  • Product settings (config settings including Backup tasks)
  • Encrypted containers (including all data)
  • Password Manager databases for all user accounts. All data that was available when working with Password Manager, such as passwords to programs and accounts, identities, notes, etc.
  • Anti-Spam databases (if the Anti-Spam component was previously used)
  • Backup stores

This makes it the easier option for most users. If you are not experiencing any issues with Pure then do this. If you have slowdown issues, configuration problems or just want a fresh install (which is always nicer) then jump to Option 2 below.

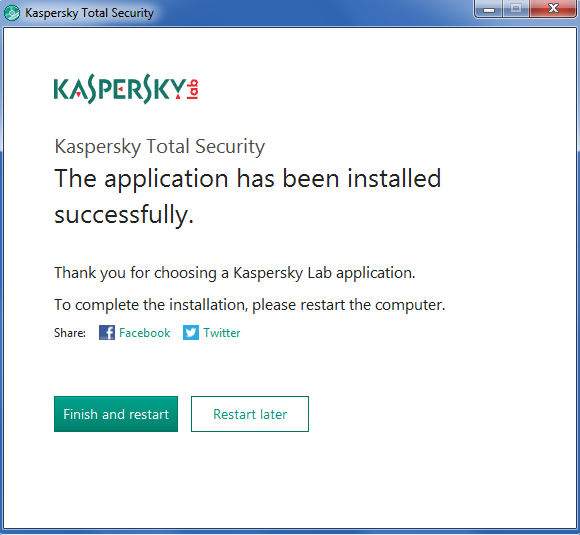
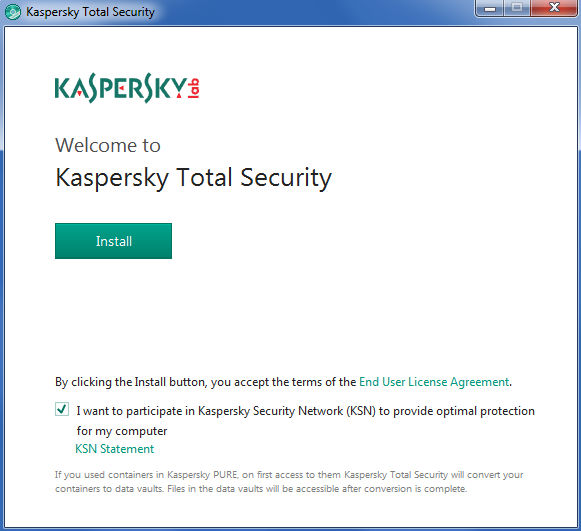
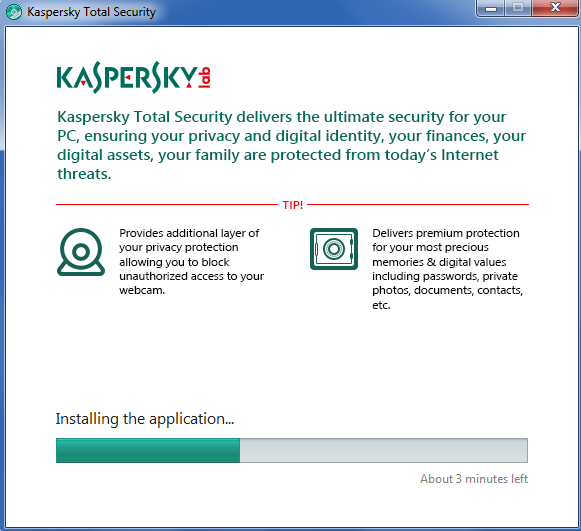
Screenshots of the installation process when installing over Kaspersky Pure:

install-kaspersky-total-security

installing-total-security

finish-restart-total-security

This took about 3 minutes for us to complete including the restart, just accept the defaults.

Option 2 – Install Kaspersky Total Security, removing Kaspersky PURE first

CAVEAT – You must have your licence key available which can be found on the card inside the product case.

CAVEAT 2 – You will lose any saved passwords in the Kaspersky Password Manager. Not everyone uses this and it won’t affect other password managers such as LastPass, Roboform, Keepass etc.

CAVEAT 3 – You will lose any quarantined files, backup stores, encrypted containers and spam databases (if used) which are again specific to Kaspersky Pure

  • Fully uninstall Kaspersky Pure via your control panel.
  • Reboot your PC
  • Install Total Internet Security from the file you downloaded earlier or from a packaged CD

If you have never installed a program before, here is some help how to do it:


I hope that this helps answer your questions on installation, upgrading and compatibility. Kaspersky remains the most effective of all the antivirus and Internet security suites that we have tested in our workshop and Total Security is a worthy replacement for Pure.