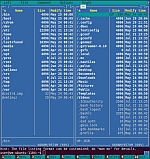
Midnight Commander tutorial

Midnight Commander tutorialMidnight Commander is a great free file manager but the problem is people are overwhelmed by the interface. Here is a quickie Midnight Commander tutorial so you can navigate and get to the files you want.
All files and directories can be moved, copied or deleted and their contents viewed by using the F keys on your keyboard. Make reference to the options list on your screen. Use a combination of F key, cursor and mouse to navigate around the screen.


Midnight Commander Select Files

In the directory panes, select single files simply by using your cursor keys to get to them.  Select multiple files by using your Insert key to highlight and press Insert again on any file to deselect.
You can filter for groups of files: the + key will bring up a selection box into which you can enter wildcards. A wildcard selects all files of a certain type, for example:

*.doc

would select all files that have the ending “.doc” in a given directory.


Midnight Commander File Operations

You can view contents or edit files using the F keys on your keyboard and press Enter (or double-click) on a file to execute or open it with an external program if you have this installed in the environment you are running in.  Since most people will be using this from a boot CD then you may not be able to open any file. If using Linux then you need to have the program installed in your distro to open the corresponding file.

There are two ‘file’ menus. F9 is for accessing operations such as changing permissions or ownership. F2 deals mostly with zipping and extracting files and subdirectories.

Note: In Midnight Commander if you are moving or copying files, it will first assume you are doing this to the opposing directory, but gives you the option to change the destination.


Hope this helps!


Dell Inspiron and Dimension – access the recovery partition

Many emails about how to access the recovery partition on Dell Inspiron and Dimension PCs.  I have noticed that Dell don’t give this information unless you pay for their premium tech support so here we go, hope this helps a few people…..

Most PCs I have tested can do this method providing the hard drive has not been changed and the original recovery image – hidden by default – is intact. I have used this method on PCs as old as 2003 but older ones may work too.

Note: This process is destructive to your data. Ensure you have all you need backed up like serial numbers for software (Office etc), address books, emails, photos and documents.

  • Power the computer on
  • When the Dell logo appears, press and hold the left <Ctrl> key then press the <F11> key
  • Release them both at the same time
  • The Dell Restore by Symantec window should now appear. If you get a keyboard error then restart the PC and try again. Note, if the PC is in the process of booting it is important that you wait for the boot to finish before shutting down or you risk adding corruption onto the hard disk drive.
  • Click the Restore button or use the <Tab> key to highlight the button and press the enter key.
  • A caution message appears advising that all data will be lost. It will be!
  • Click the Confirm button or press the <Tab> key to highlight the button and press the enter key.
  • The Progress window appears.  This can take up to 40 minutes to complete.
  • After a successful restore,  a message stating The system recovery process was successful appears.
  • Click on the Finish button or press the <Tab> key to highlight the button, then press the <Enter> key.

The computer restarts and your software should be as it was when you first received your computer.  Spend a bit of time uninstalling all of the 30-day trial rubbish and uninstall any security suite that was offered at the time as it will be old and superceded. Make sure you update the system to the latest service packs and security updates using Windows Update.  Install a decent antivirus and the best antispyware and your system will be as good as new. Or better!


Restore Acer laptops and desktops from the recovery partition

acer-laptop-discount-prices-onlineThe following is my procedure for restoring Acer laptops and desktops to factory settings. You will need to ensure that laptops are plugged in at the mains charger as this is critical.

  1. First off, locate the Alt key to the left of the space bar, and the F10 key on the top row of keys.
  2. Power the computer on and wait for the Acer logo to appear (the splash screen).
  3. Hold the  Alt and F10 keys down together when you see the logo.
    It should load the Windows logo then state “Please wait a moment…..” with the Acer logo showing.
  4. At the “eRecovery Management” menu it will ask you how you wish to restore.
  5. Click on the restore option you would like to use, bearing in mind that restoring the C partition means you will lose all files not backed up.
  6. When prompted for the password use one you created. If you didn’t create one then use 1234
  7. Allow the recovery to finish and it will automatically restart the computer

How to Recover your Acer system from within Windows

  1. Click on Start, All Programs, Acer Empowering Technology.
  2. Click on Acer eRecovery Management.
  3. If prompted to create a password, create the password and set your password hint
    Don’t lose this password!
  4. When the Acer eRecovery Management loads click the button labeled “Restore”.
  5. Click on “Restore system to factory default”.
  6. The unit will restart and start the restore.
    It should state “Please wait a moment…” with the Acer logo in the upper left hand corner.
  7. At the eRecovery Management menu it will ask you how you wish to restore.
    Click on the restore option you would like to use.

How to Make Recovery DVDs

These are really useful if ever your hard drive dies. The reason is that the recovery image is stored on the hard drive itself and as such will “die” with it. Replacing your hard drive means that you will need to get an image from somewhere if you don’t have these discs, eg reinstall using a fresh copy of Windows and then install and update all the drivers on your pc, not easy for beginners

  1. Click on Start, All Programs, Acer Empowering Technology.
  2. Click on Acer eRecovery Management.
  3. If prompted, create a password and password hint.
    Don’t lose this password!.
  4. When the Acer eRecovery Management loads, click the button labeled “Burn Disc”.
  5. Click “Create Factory default disc”.
  6. Follow the instructions and put in the required Blank DVD or Blank CD media to make a set of Recovery Media Discs. Bear in mind that you will need about 3 DVDs but more like 17 CDs!

Register Kaspersky Pure or Internet Security with a new key

kaspersky-pure-2011-2012-cheapest-renewal-priceHere’s my method for registering a new product key within Kaspersky Pure, Internet Security or Antivirus. Using this method you can legitimately use a licence that you own to add extra licence time onto an already installed Kaspersky product. This is great when it comes to renewal time and you want to use a licence that you purchased at a rock bottom price (see my Cheapest Kaspersky Internet Security Licence article)

  • First off, check you are using the correct licence for the number of computers, ie the 3-user licence is for up to 3 separate PCs where the 1-user licence literally allows use on 1 PC only
  • Double click the Kaspersky icon in the system tray (bottom right of screen).  If this is not visible use the arrow to the left of the icons to expand the menu and select it.
  • In the main Kaspersky Window, click on “Licence expired” (NOT “Renew licence”). If you are renewing before expiry then you should click on “Licence X days remaining” in the bottom right corner
  • Click “Activate the application with a new licence”
  • Type in your code that came with the product you bought. On CD versions this is either on the CD itself or printed on the inside paper sleeve.  Click on Next
  • Fill in the email address and country (optional, we don’t do this) and click Next
  • The Kaspersky software will connect to the activation servers and you are now registered for another 12 months!

Register Kaspersky Pure or Internet Security with the cheapest licence key?

Want to know where to get the cheapest licence keys and renewals? No worries, read how to get the cheapest Kaspersky Internet Security or Kaspersky Pure and use my method to register the latest full product absolutely free!


Cheapest Kaspersky Internet Security renewal

Many people are looking for the cheapest renewal price for Kaspersky Internet Security. This product is their flagship one along with “Kaspersky Pure“, having antivirus, firewall, antispyware, parental control, anti-spam, safe run and much more.

The PCRepairMan rates this as the best protection security package currently available, with fantastic detection rates and top stability.  Performance is very good and Windows 7 compatibility is seamless.

kaspersky internet security discountBecause it is a fully fledged Internet Security package, Kaspersky charge quite a premium for purchase and renewal. My little-known method is to purchase an older Kaspersky software version that is fully licensed (look at the selection below) but download and install the latest version from here. It’s a trial version but becomes full on activation.  Then, simply use the purchased licence key (from the old version) to activate the latest version when prompted – no need to install the old version at all!

I have written full instructions for what to do at renewal time too (12 months later) which you can read here:

How to register Kaspersy Internet Security with a new product key

Kaspersky free upgrade registration method

Because Kaspersky offers a free upgrade to this version from all previous ones from 2009 onwards, this is a completely legitimate method.  Importantly, you will save LOTS of money without needing any underhanded pirate serial codes that only last for a few weeks.  With Kaspersky prices being anything up to 85% cheaper in the deals below, it makes serious sense and you get the best security suite currently available.

CAVEAT – Check that you purchase the correct licence for the number of computers you are installing on, ie the 3-user licence is for up to 3 separate PCs where the 1-user licence will only allow use on 1 PC. Also check that the product you download is the same as the product you have purchased the older version of, eg “Kaspersky Internet Security” not “Kaspersky Pure” or “Kaspersky Antivirus”

Personally, I’d go for the internet security package rather than just the antivirus as there will be a very small difference in cost but there’s a huge amount of extra functionality.

If you do use my method, please either drop a little donation in the tin, ‘Tweet’ or Facebook ‘like’ this article or just give me a link back to help others save some cash!

I sell hugely discounted antivirus packages in my software store that can be used with this method:

Buy discounted packages now


Click here for similar deals on Kaspersky Pure

Got Norton products instead? Checkout these:

Cheapest Norton Internet Security renewal or Cheapest Norton Antivirus renewal or Cheapest Norton 360 renewal


Starting a Windows PC in Safe Mode

How to start a Windows PC in Safe Mode

You should print these instructions if you need to access the same PC in safe mode.

If your computer is turned on, click start and then click shut down wait for 20 seconds and turn your PC back on using the power button.

As the computer starts up you will first see the BIOS screen which contains information about your computer. Shortly afterwards you need to press F8. The method I use and teach to others is to simply tap the F8 key approximately every quarter of a second. This will bring up a selection menu of white writing on a black screen.

Should you miss this selection menu then you will need to wait until Windows finishes loading, shutdown, then retry the startup procedure again.